Showing posts with label Food Network. Show all posts

Saturday, July 31, 2010

CSN Stores GIVEAWAY & Cinnamon Rolls

Those wonderful people at CSN Stores have done it again.  They are allowing me to host a GIVEAWAY on my blog to one of you lovely readers!  Awesome, right?

CSN features over 200+ stores with tons of products at incredible prices.  They offer le creuset cookware, furniture, pet products, outdoor products and so much more.   But what are they offering you, you ask?  CSN has graciously offered to give one of my readers a $50 gift card in the form of a promotional code that can be used on any product on their site....yippee!

I’ll be randomly selecting one lucky reader to win this GIVEAWAY!  There are 5 ways to enter and all entries must be received by midnight (AZ Time) on Friday, August 6th and here’s how you enter:

  1. Leave a comment telling me what you would spend your $50 gift card on at CSN Stores

  2. Follow ME on Twitter @saraboff

  3. Follow CSN on Twitter @csnstores

  4. Follow MY DOG on Twitter @dieselboff (he’s pretty funny!)

  5. Become a Follower of Sara’s Sweets

*If you become of follower on Twitter or on Google Reader, leave separate comments to let me know.

Alright now let’s get onto today’s recipe because it sure is a good one!  About a week ago while at work, I got the sudden urge to make cinnamon rolls.  It was really weird.  I haven’t eaten a cinnamon roll in quiet awhile and I’ve never made cinnamon rolls before, but knowing that I had a packet of yeast at home, I figured, why not!

In my search for a recipe, I found 2 that I liked.  I selected the recipe below because it had great reviews, but I liked the “overnight” technique of this recipe by Alton Brown of Food Network, especially since my plan was to take them into work in the morning. 

My only  modification to the recipe was that I used whole wheat flour and light cream cheese.  You see, using those two ingredients completely cancels out all the calories from the 3 sticks of butter that are in this recipe.  Really, they do! 

Speaking of the 3 sticks of butter, I’m not gonna lie….they are totally worth it!  These cinnamon rolls were light in texture, flavorful in the cinnamon/sugar filling and rich in the frosting.  Pretty much they were amazing!  Right after they came out of the oven, I took them to work, so my co-workers could experience them being warm and gooey…that’s when cinnamon rolls are best, right?  I set them on the counter at 7am and the pan was wiped clean by 7:30am.  No joke!  Food goes fast in my office, but I’ve never seen it go that fast before.  In fact, I almost didn’t get to try one!  If I hadn’t moseyed into the kitchen for coffee at 7:20am, my chance to try these beauties almost ceased to exist!  If my co-workers didn’t love me already, I’m 99.9% certain that they love me now that I brought them cinnamon rolls.

Enjoy!

   IMG_2297

Ingredients.

IMG_2298

Rolled out dough.

IMG_2299

About to go in the oven.

IMG_2300

Out of the oven.

IMG_2301

Frosted with copious amounts of icing!

Cinnabon Cinnamon Rolls by Recipezaar (newly named Food.com)

Printer-friendly Version

Ingredients
  • 1 ( 1/4 ounce) package dry yeast
  • 1 cup warm milk
  • 1/2 cup granulated sugar
  • 1/2 cup margarine
  • 1 teaspoon salt
  • 2 eggs
  • 4 cups flour
Filling
  • 1 cup packed brown sugar
  • 2 1/2 tablespoons cinnamon
  • 1/2 cup margarine, softened
Icing
  • 8 tablespoons margarine
  • 1 1/2 cups powdered sugar
  • 1/4 cup cream cheese
  • 1/2 teaspoon vanilla
  • 1/4 teaspoon salt

Directions

  1. For the rolls, dissolve the yeast in the warm milk in a large bowl.
  2. Add sugar, margarine salt, eggs, and flour, mix well.
  3. Knead the dough into a large ball, using your hands dusted lightly with flour.
  4. Put in a bowl, cover and let rise in a warm place about 1 hour or until the dough has doubled in size.
  5. Roll the dough out on a lightly floured surface, until it is approx 21 inches long by 16 inches wide.
  6. It should be approx 1/4 thick.
  7. Preheat oven to 400 degrees.
  8. To make filling, combine the brown sugar and cinnamon in a bowl.
  9. Spread the softened margarine over the surface of the dough, then sprinkle the brown sugar and cinnamon evenly over the surface.
  10. Working carefully, from the long edge, roll the dough down to the bottom edge.
  11. Cut the dough into 1 3/4 inch slices, and place in a lightly greased baking pan.
  12. Bake for 10 minutes or until light golden brown.
  13. While the rolls are baking combine the icing ingredients.
  14. Beat well with an electric mixer until fluffy.
  15. When the rolls are done, spread generously with icing

Sunday, May 16, 2010

Chicken Marengo and Spinach Citrus Salad

Yum, I have such a delicious meal to share with you all today!  One of my favorite shows on Food Network is The Next Food Network Star.  (Whoo, the new season starts on June 6th!  Who’s excited??)  Last season, Melissa d’Arabian won the competition and got her own show, which I rather enjoy.  Melissa’s signature cooking technique that helped her win was her 4-step chicken. 

Last Sunday, I was watching Food Network re-runs last and saw her make this chicken Marengo and spinach citrus salad.  I’d never heard of Chicken Marengo before, but her easy cooking technique and the deliciousness of the food convinced me that I needed to try this recipe…and I’m sure glad I did.

The chicken Marengo reminded me of a lot of chicken cacciatore.  It’s filled with tomatoes, mushrooms, onions and yellow bell pepper, and it is yummy!  Plus, with Melissa’s easy 4-step cooking method, I was surprised to see that it came together in about 30 minutes and all I had to do was spend about 10 minutes on the salad.  Speaking of the salad, let’s talk about it because it too was fabulous!  I wouldn’t think that spinach and citrus would be a good combination…but what-da-ya-know, it is!  The spinach is mild, the orange segments are tart, the dressing is light and refreshing, and the pecans…oh my, the pecans…they are seasoned with rosemary and cayenne, and they MAKE the salad!

I’m so glad that I made this recipe and I plan to make it again.  Jeremy and I just ate the chicken Marengo and the salad (trying to stay low carb for P90X), but this could easily be paired with some white or brown rice for a complete meal.  A few modifications, per my style, I skipped the flouring of the chicken and I used 1 cup of chicken broth as a substitute for the white wine and beef broth.  With the salad, I used baby spinach and next time I’d probably use 4 cups instead of 3 because there was a lot of dressing for only 3 cups.  As for the dressing, I only had olive oil so I used that and only used 3 tablespoons.

Mmmm, just thinking about this recipe makes me want it again.  We had extra veggies/sauce and I ate that later in the week for lunch over a turkey burger patty.  SO good!  I’m going to have to look into some more recipes from Melissa d’Arabian because she’s totally won me over with this recipe.  It has my highest recommendation! 

Enjoy!

    IMG_2226

Ingredients, minus the chicken.

IMG_2227

Prepped veggies.

IMG_2228

Spinach salad ingredients.

IMG_2229

What a great dinner!

4 Step Chicken Marengo by Food Network

Ingredients

  • 3 large chicken cutlets, sliced into thin paillards (slice while partially frozen)
  • Kosher salt and freshly ground black pepper
  • 1/2 cup all-purpose flour (skipped this)
  • 3 tablespoons vegetable oil (used olive oil)
  • 1 medium sweet onion, sliced
  • 1/2 pound mushrooms, sliced
  • 1 yellow bell pepper, seeded and julienned
  • 2 tablespoons tomato paste
  • 1/2 cup white wine (used chicken broth)
  • 1/2 cup beef broth (used chicken broth)
  • 1 (14-ounce) can chopped tomatoes
  • 1/2 tablespoon butter

Directions

  1. Season the chicken with salt and pepper, to taste, and lightly dredge in flour.
  2. In a large sauté pan, heat the oil over medium-high heat and add the chicken. Brown on both sides, until nicely golden, about 3 minutes per side. Remove from the pan and set aside on a plate.
  3. In the same pan, add more oil, if needed, along with the onion, mushrooms and peppers and sauté until softened and fragrant, but not limp, about 5 minutes.
  4. Season with salt and pepper, to taste.
  5. Stir in the tomato paste and cook a few minutes to cook out the raw flavor.
  6. Turn up the heat, and add the wine/wine to deglaze the pan and let it reduce for 2 or 3 minutes.
  7. Add the beef broth and tomatoes.
  8. Once the mixture begins to bubble, add the browned paillards and any juices from the chicken and reduce the heat to a simmer.
  9. Cook until the chicken is warmed through, about 3 minutes.
  10. Turn the heat off and stir in the butter.
  11. Transfer to a serving platter and serve immediately.

Spinach and Citrus Salad with Sweet and Spicy Pecans

Ingredients

  • 3 cups fresh spinach, washed and dried, cut into chiffonade
  • 2 green onions, chopped
  • 1 orange, supremed and halved
  • 1 tablespoon butter
  • 1/2 teaspoon sugar
  • 1/2 cup pecan halves
  • 1 teaspoon dried rosemary
  • 1/4 teaspoon cayenne
  • Salt and freshly ground black pepper
  • Citrus Dressing, recipe follows

Directions

  1. Put the spinach and green onions in large salad bowl and sprinkle with the halved citrus supremes.
  2. In a small saute pan over medium heat, add the butter and sugar and stir until the butter is melted.
  3. Add the pecans and toss until the pecans begin to brown.
  4. Stir in the rosemary and cayenne and stir just a few seconds to release the aroma.
  5. Remove from the heat and season with salt and pepper, to taste.
  6. Sprinkle the pecans on the salad while still warm.
  7. Drizzle the dressing over salad and serve.

Citrus Dressing

  • 1 teaspoon Dijon mustard
  • 2 tablespoons orange or grapefruit juice (or a combination)
  • 3 tablespoons canola oil (used olive oil)
  • 1 tablespoon olive oil (omitted this tbs)
  • Salt and freshly ground black pepper

In a small bowl, add all the ingredients and whisk until emulsified.

Monday, October 19, 2009

Pineapple Blueberry Crunch Cake

Following our Pulled Pork Sandwiches, you know we had dessert!  Someone at Jeremy’s work made this and he liked it so much that he requested that I make it for when Jayla came over.

The recipe is from Ms. Paula Deen and to be honest with you, I love to watch her show, but I don’t really like to make her recipes.  In case you haven’t noticed…her recipes aren’t exactly healthy.  They are usually loaded with butter, cream, cheese and pretty much anything unhealthy.  Oh well, a treat everyone in  awhile doesn’t hurt, right?

This recipe was super simple and very good!  The bottom is a mix of pineapple and blueberries, while the top is cakey and nutty.  Yum!  I’m sure this would be great with other types of fruit like canned peaches, pears and apple pie filling.  If you’re looking for an easy, fruity and delicious dessert recipe, I would highly recommend this one…even though it calls for almost 2 sticks of butter. :)

Enjoy!

IMG_1865

Ingredients.

IMG_1873

Per the recipe, it serves 8 people.  This is how much was left after 3 people ate some.  Oh Paula, you and your out of control portion sizes!

IMG_1874

My close up.

1262

Paula’s close up.  Now, why couldn’t mine look that pretty?

Pineapple Blueberry Crunch Cake, by Paula Dean

Ingredients

  • 3/4 cup butter, plus more for dish
  • 1 (20-ounce) can crushed pineapple, in juice
  • 1 (20-ounce) can blueberry pie filling
  • 1 (18.25-ounce) box yellow cake mix
  • 1 cup chopped pecans

Directions

  1. Preheat oven to 350 degrees F. Butter a 13 by 9-inch casserole dish.
  2. Melt 3/4 cup butter in saucepan over low heat.
  3. Pour the pineapple with juice into the casserole dish and evenly spread blueberry pie filling on top. Cover with dry yellow cake mix and top with pecans. Drizzle with melted butter and bake for 35 to 45 minutes.

Sunday, July 26, 2009

Chicken Parmesan

This Chicken Parmesan is a quick and easy recipe, from Robin Miller’s Quick Fix Meals.  A few years ago, Robin did a demonstration at a cooking store in the fabulous city (and my home) of Scottsdale (she and her family live there).  Once my parents and I heard about the event, we knew we were definitely going.  At the demo, she made tasty food, answered questions and of course, signed her cookbook.  This is one of my favorite cookbooks, not only because (so far) it’s my only autographed one, but also because I love Robin’s idea of “morphing” recipes to give you different meals through out the week.

IMG_1720

I’ve made this recipe a few times and it’s for sure a keeper.  The sauce is delicious and so easy to make.  Plus, it takes minutes to bread the chicken and throw every thing into the oven.  I only make two chicken breasts, so I cut the breading ingredients in half.  However, I do make all the sauce because I serve this with pasta and Jerm and I are saucy kind of people.  

Enjoy!

IMG_1712

Ingredients.

IMG_1715

Pre-trip into the oven.

IMG_1716

Post-trip into the oven and served with pasta.

Chicken Parmesan, by Robin Miller (Quick Fix Meals)

Ingredients

  • One 14 oz. can crushed tomatoes
  • One 6 oz. can tomato paste
  • 2 tsp dried basil
  • 2 tsp dried oregano
  • 1 tsp garlic powder
  • 1/2 cup flour
  • 1/2 tsp salt
  • 1/4 tsp ground black pepper
  • 1 large egg, lightly beaten
  • 1/2 dry seasoned bread crumbs
  • 3 – 4 boneless skinless chicken breasts
  • 1 tbs olive oil
  • 1 cup shredded part-skim mozzarella cheese
  • 4 tsps grated Parmesan cheese

Directions

  1. Preheat oven 400 degrees.  Coat baking dish with cooking spray.
  2. In a medium saucepan, combine the tomatoes, tomato paste, basil, oregano, and garlic powder.  Set over medium heat, bring to a simmer and let simmer until ready to use (about 10 minutes).
  3. In a shallow dish, combine the flour, salt and pepper.  Place eggs in a separate shallow dish and the bread crumbs in a third. 
  4. Dredge the chicken in the flour, evenly coating both sides and tapping off any excess.  Dip both sides of the flour-coated chicken in the egg and then in the bread crumbs.
  5. Heat oil in a large skillet over medium high heat.  Add the chicken to the hot pan and cook until golden brown, 2-3 minutes per side.
  6. Transfer chicken to the prepared baking dish.
  7. Top with tomato sauce, mozzarella an Parmesan.
  8. Cover with foil and bake 20 minutes.  Uncover and bake 5-10 minute, until the chicken is cooked thoroughly and the cheese is golden and bubbly.

Sunday, June 21, 2009

Mini Tacos and Cheeseburgers

My friends, Juliann and Alli, came over last week for a "Girl's Night Sleepover."  We decided that we were going to have a theme of "kids night," which meant we were going to watch kid movies and have kid food.  I was in charge of the menu and I decided to make Mini Tacos, Mini Cheeseburgers, veggie sticks and dip, and apples with caramel dip. 

I found the recipe for the Mini Tacos from Recipezaar and once again, that website didn't fail me.  These were super easy and surprisingly very good.  The tacos are won ton wrappers, filled with taco seasoned meat (I used ground turkey), salsa and cheese.  Yum!

IMG_1646

Ingredients.

IMG_1648

Just out of the oven.

For the Mini Burgers, I saw Ms. Paula Deen make them on one of her shows and they looked great.  They are little beef patties (with mustard and ketchup baked in) topped with cheese and baked inside puff pastry.  Now let's take a moment and talk about puff pastry.  Apparently, it's NOT the same thing as phyllo dough!  Did anyone else know this?  Because I didn't and I bought phyllo dough and though the burgers were still good...they were "interesting" with the phyllo dough bun/crust.  So, we'll just leave it at that...make sure to buy puff pastry and NOT phyllo dough.

Both these recipes were very easy and very taste.  If you have kids or if you're like us and just want some "kid" food, I highly recommend both these recipes. 

Enjoy!

IMG_1647

Ingredients.

IMG_1649

Ugly burger in phyllo dough...but still tasty!

Mini Tacos, by Recipezaar

Ingredients

Directions
  1. Cook hamburger until browned. 
  2. Drain the fat.  Stir in taco mix ans 1/2 cup salsa/picante sauce.
  3. Simmer for 3-5 minutes.
  4. Press wonton wrappers into mini muffin cups.
  5. Spoon beef mixture in cups and top with the 3 tbs of salsa and cheese, evenly divided.
  6. Bake in preheated 425°F oven for 8 minutes, or until the wontons are nicely browned.
  7. Serve with extra salsa, sour cream, olives and guacamole if desired.

Mini Burgers, by Paula Deen

Ingredients

  • 8 ounces ground beef
  • 2 teaspoons ketchup
  • 2 teaspoons Dijon mustard
  • 1/4 teaspoon salt
  • 1/4 teaspoon freshly ground black pepper
  • 1 tablespoon extra virgin olive oil
  • All-purpose flour for dusting
  • 1 sheet (from a 17.5-ounce package) puff pastry
  • 2 ounces (about 1/2 cup) Cheddar, shredded
  • 1 large egg, beaten with 1 teaspoon water

Directions

  1. Preheat oven to 400 degrees F. Line a rimmed baking sheet with parchment paper; set aside.
  2. In a large bowl, mix together the beef, ketchup, mustard, salt, and pepper. Form the mixture into 8 equal-size patties. In a large skillet, over medium-high heat, brown the patties for 1 to 2 minutes.
  3. On a lightly floured surface, unfold the pastry and roll out. Cut the pastry lengthwise into 4 equal strips, then cut strips in 1/2 crosswise. Place 1 patty on each strip and top with cheese. Fold the pastry up around the burgers and pinch the edges together to seal, molding to fit around the patties. Brush the tops of the pastries with the egg mixture.
  4. Place the mini burgers on the prepared baking sheet. Bake for 12 to15 minutes or until puffed and golden. Let stand for 5 minutes before serving.

Sunday, April 12, 2009

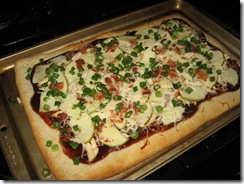
BBQ Chicken Pizza

Hello blog world!  I'm sorry that I've been MIA lately, but our new puppy has been keeping us pretty busy.  I've been taking pictures of the meals that I've made, but I just haven't found the time to blog about them...until now.

So, getting back in action, I present to you a delicious BBQ Chicken Pizza!  I love pizza and I love BBQ sauce, so whoever created the idea of BBQ Chicken Pizza is a hero in my book.  This recipe is from Sandra Lee's Semi-Homemade on Food Network.  Unlike a traditional BBQ Chicken Pizza, this one has sliced apples and bacon bits on top, which adds a great texture to it.  I've made this a few times and Jeremy and I love it.  I've always cooked it in the oven, as opposed to cooking it on the grill, as the recipe directs but I get it'd be great and crispy that way.  Use your favorite BBQ sauce and add any additional toppings that you'd like.  Cilantro goes great on BBQ Chicken Pizza! 

Enjoy!

IMG_1417

Ingredients.

IMG_1419[2]

Pre-baked.

IMG_1420

Post-baked.

IMG_1421 

Ready to eat!

BBQ Chicken Pizza, by Sandra Lee

Ingredients

  • 1/2 pound chicken cutlets
  • 1 tablespoon vegetable oil
  • Salt and pepper
  • 1 (13.8-ounce) can refrigerated pizza dough (recommended: Pillsbury)
  • 1 cup BBQ sauce
  • 2 cups shredded mozzarella cheese
  • 1 cup green apple, sliced
  • 1/4 cup real bacon bits
  • 2 green onions, sliced

Directions

  1. Set up grill for direct cooking over medium-high heat. Oil grate when ready to start cooking.
  2. Brush chicken with vegetable oil, season with salt and pepper. Place chicken on the grill and cook until done, about 2 minutes per side. When done, slice into 1-inch pieces, reserve.
  3. Spray a perforated disposable cookie sheet with nonstick cooking spray. Carefully remove pizza dough from can. Unroll dough and place on cookie sheet on the grill. Let cook 2 minutes and turn pizza over.
  4. Spread BBQ sauce over pizza leaving a 1-inch border. Next, top with mozzarella cheese, diced apples, chicken, and bacon pieces.
  5. Cover with grill lid and cook 5 minutes until cheese is melted and bubbly.
  6. Serve hot, topped with green onions.
  7. Cook's Note: Cooking indoors: Preheat oven to 425 degrees F. Lightly spray baking sheet with cooking spray; set aside. Carefully unroll dough and place on prepared baking sheet. Press out dough with clean hands to form 13 by 9-inch rectangle. Use oven mitts to place baking sheet in preheated oven. Bake in for 7 minutes or until crust just begins to brown. Use oven mitts to remove crust from oven and top as directed. Use oven mitts to return to oven for 8 to 10 minutes or until golden brown and cheese is melted and has begun to bubble.

Monday, March 23, 2009

Grown Up Mac and Cheese

As I mentioned before, I love Food Network.  I'll be honest and say that I'm not an extremely huge fan of Ina Garten, the Barefoot Contessa.  I'll watch her if she's on, but something about her is just odd to me.  Plus, most of her recipes have about one million calories in them...and I usually try to avoid food like that. 

Well, one day the Barefoot Contessa happened to be on and Jeremy and I ended up watching it.  On the episode, she made a "Grown Up Mac and Cheese" that looked pretty dang good!  Jeremy requested that I make so I did. 

This is a delicious Mac and Cheese with some complex flavors from the three different cheeses and the bacon in it.  That's right...there's bacon in it too.  Yum!  The first time I made it, I followed the recipe to a "t," and I found the blue cheese flavor to be a bit strong for my taste.  I recently made it again with a milder blue cheese and it was FANTASTIC!  The bubbly cheese, the crisp bacon and the crunchy breadcrumb topping = simply amazing! 

As usual, I used skim milk and whole wheat flour.  Plus, I didn't feel like making fresh breadcrumbs, so I just used store bought kind, and I cooked the bacon in the microwave like I normally do.  Please note that this recipe say it serves 2 people...yea well, maybe if those 2 people can eat a TON of pasta.  Seriously Ina, what are you thinking?!  I've found that this recipe can very easily feed a group of 4 or at least give me and Jeremy dinner for two days.  Enjoy!

IMG_1397

Ingredients.

IMG_1398

Prepping.

IMG_1399

In the oven cooking.  (I forgot to get a picture before we ate it, so just imagine it looking bubbly and having golden crumbs on top.)

Grown Up Mac and Cheese by Ina Garten

Directions

  • 4 ounces thick-sliced bacon
  • Vegetable oil
  • Kosher salt
  • 2 cups elbow macaroni or cavatappi
  • 1 1/2 cups milk
  • 2 tablespoons unsalted butter
  • 2 tablespoons all-purpose flour
  • 4 ounces Gruyere cheese, grated
  • 3 ounces extra-sharp Cheddar, grated
  • 2 ounces blue cheese, such as Roquefort, crumbled
  • 1/4 teaspoon freshly ground black pepper
  • Pinch nutmeg
  • 2 slices white sandwich bread, crusts removed
  • 2 tablespoons freshly chopped basil leaves

Directions

  1. Preheat the oven to 400 degrees F.
  2. Place a baking rack on a sheet pan and arrange the bacon in 1 layer on the baking rack. Bake for 15 to 20 minutes, until the bacon is crisp. Remove the pan carefully from the oven - there will be hot grease in the pan! Transfer the bacon to a plate lined with paper towels and crumble when it is cool enough to handle.
  3. Drizzle oil into a large pot of boiling salted water. Add the macaroni and cook according to the directions on the package, 6 to 8 minutes. Drain well.
  4. Meanwhile, heat the milk in a small saucepan, but don't boil it. Melt the butter in a medium pot and add the flour. Cook over low heat for 2 minutes, stirring with a whisk. While whisking, add the hot milk and cook for a minute or 2 more, until thickened and smooth. Off the heat, add the Gruyere, Cheddar, blue cheese, 1 teaspoon salt, pepper, and nutmeg. Add the cooked macaroni and crumbled bacon and stir well. Pour into 2 individual size gratin dishes.
  5. Place the bread slices in a food processor fitted with a steel blade and pulse until you have coarse crumbs. Add the basil and pulse to combine. Sprinkle the bread crumb mixture over the top of the pasta. Bake for 35 to 40 minutes, or until the sauce is bubbly and the macaroni is browned on the top.

Tuesday, February 24, 2009

Heartbreak Healer Cookies

I'm a huge fan of Food Network!  I love Rachel, Sandra, Paula, the Neely's and Alton, plus all the great competition shows that they have.  One of my new favorites is Ultimate Recipe Showdown.  This season was great!  Not only did all the recipes on every show look fantastic, but it was especially enjoyable since I read the blogs of three of the contestants: Emily of Visions of a Sugar Plum, Jenny of Picky Palate and Julie of Peanut Butter and Julie.  Fun!  I have a stack of recipes to try from Ultimate Recipe Showdowns and tonight I decided to try the  $25,000 winning recipe from the Dessert Show, the Heartbreak Healer cookies. 

I've never quite tasted any cookie like this before and that's a really good thing!  They are chocolate cookie with great combination of cinnamon, maple syrup and espresso.  Yum!

As usual, I made some substitutions: whole wheat flour instead of all-purpose, sugar free pancake syrup instead of pure maple and ground coffee (Triple Chocolate flavor!) instead of espresso granules.  These were what I had on hand, I figured they were close enough and really, that's just how I roll when I cook!  :)  Plus, I only had 1 cup of chocolate chips instead of the two and I baked them for an additional 2 minutes, which is typical since I'm at a high elevation.

IMG_12012  IMG_1202[5]

I think these cookies are delicious!  The combo of flavor is very unique!  I just finished baking them and I've already eaten three.  Enjoy!

 IMG_1196  

Ingredients.

 IMG_1203[2]

All mixed together and in the "scooping" process.

 IMG_1204[2]

Cooling on the counter.

Heartbreak Healers by Lisa RomanFood Network - Ultimate Recipe Showdown: Desserts

Ingredients

  • 2 1/4 cups all-purpose flour
  • 2/3 cup baking cocoa
  • 1 teaspoon baking soda
  • 2 teaspoons ground cinnamon
  • 1/4 teaspoon salt
  • 1 cup light brown sugar, packed
  • 1 cup butter, softened
  • 1/2 cup granulated sugar
  • 1/2 cup maple syrup
  • 1 teaspoon vanilla extract
  • 3 tablespoons espresso granules
  • 2 eggs
  • 2 cups semisweet chocolate chunks
  • 1 1/2 cups walnut pieces

Directions

  1. Preheat oven to 350 degrees F.
  2. In a mixing bowl combine flour, cocoa, baking soda, cinnamon and salt. Set aside.
  3. In a larger mixing bowl combine brown sugar, butter, sugar, maple syrup and vanilla. Mix until smooth.
  4. Add in espresso granules and eggs.
  5. Mix in dry ingredients until thoroughly combined. Stir in chocolate chunks and walnut pieces.
  6. Line a baking sheet with parchment paper. Drop cookie dough by rounded spoonfuls onto parchment paper.
  7. Bake for 12 minutes. After baking, place cookies on a cooling rack and allow to cool for 10 minutes. Serve with milk.