Showing posts with label dinner. Show all posts

Wednesday, July 14, 2010

Chili

I’ve always been a fan of chili.  It’s warm.  It’s chunky.  It’s delicious.  And you know what else I like about chili?  It’s so versatile and everyone has their own recipe!  The possibilities are endless.  Meat or no meat?  Chicken or beef?  Beans or no beans? Veggies or…well, you get the idea. 

Chili is a great recipe if your doing P90X because the different phases of the nutrition plan that accompanies the workout of P90X are all pretty low carb.  I found this recipe by just Googling “P90X Chili,” and then I just adjusted per our tastes.  Not only is this chili is packed full of protein, but it’s also flavorful, hearty and easy!  Add a side salad and you’ve got a delicious low carb dinner…whether your doing P90X or not.

Enjoy!

 IMG_2283

Ingredients.

IMG_2284

Mmmm, chili.

P90X Chili

Makes 7 1/2 servings, 1 cup servings

Ingredients

  • 1 1/2 teaspoons olive oil
  • 1 pound ground chicken breast
  • 1 onion, chopped
  • 2 cups water
  • 28 ounce canned crushed tomatoes
  • 15 ounce canned kidney beans - drained, rinsed,
  • 1 tablespoon garlic, minced
  • 2 – 2 1/2  tablespoons chili powder
  • 1/2 teaspoon paprika
  • 1/2 - 3/4 teaspoon dried oregano
  • 1/2 teaspoon ground cayenne pepper
  • 1/2 - 3/4 teaspoon ground cumin
  • 1/2 teaspoon salt
  • 1/2 teaspoon ground black pepper

Directions

  1. Heat the oil in a large pot over medium heat. Place turkey in the pot, and cook until evenly brown.
  2. Stir in onion, and cook until tender.
  3. Pour water into the pot.
  4. Mix in tomatoes, kidney beans, and garlic.
  5. Season with chili powder, paprika, oregano, cayenne pepper, cumin, salt, and pepper.
  6. Bring to a boil. Reduce heat to low, cover, and simmer 30 minutes.
Read more, plus nutrition facts!: http://caloriecount.about.com/p90x-chili-recipe-r385258#ixzz0th4rQiWp

Sunday, May 16, 2010

Chicken Marengo and Spinach Citrus Salad

Yum, I have such a delicious meal to share with you all today!  One of my favorite shows on Food Network is The Next Food Network Star.  (Whoo, the new season starts on June 6th!  Who’s excited??)  Last season, Melissa d’Arabian won the competition and got her own show, which I rather enjoy.  Melissa’s signature cooking technique that helped her win was her 4-step chicken. 

Last Sunday, I was watching Food Network re-runs last and saw her make this chicken Marengo and spinach citrus salad.  I’d never heard of Chicken Marengo before, but her easy cooking technique and the deliciousness of the food convinced me that I needed to try this recipe…and I’m sure glad I did.

The chicken Marengo reminded me of a lot of chicken cacciatore.  It’s filled with tomatoes, mushrooms, onions and yellow bell pepper, and it is yummy!  Plus, with Melissa’s easy 4-step cooking method, I was surprised to see that it came together in about 30 minutes and all I had to do was spend about 10 minutes on the salad.  Speaking of the salad, let’s talk about it because it too was fabulous!  I wouldn’t think that spinach and citrus would be a good combination…but what-da-ya-know, it is!  The spinach is mild, the orange segments are tart, the dressing is light and refreshing, and the pecans…oh my, the pecans…they are seasoned with rosemary and cayenne, and they MAKE the salad!

I’m so glad that I made this recipe and I plan to make it again.  Jeremy and I just ate the chicken Marengo and the salad (trying to stay low carb for P90X), but this could easily be paired with some white or brown rice for a complete meal.  A few modifications, per my style, I skipped the flouring of the chicken and I used 1 cup of chicken broth as a substitute for the white wine and beef broth.  With the salad, I used baby spinach and next time I’d probably use 4 cups instead of 3 because there was a lot of dressing for only 3 cups.  As for the dressing, I only had olive oil so I used that and only used 3 tablespoons.

Mmmm, just thinking about this recipe makes me want it again.  We had extra veggies/sauce and I ate that later in the week for lunch over a turkey burger patty.  SO good!  I’m going to have to look into some more recipes from Melissa d’Arabian because she’s totally won me over with this recipe.  It has my highest recommendation! 

Enjoy!

    IMG_2226

Ingredients, minus the chicken.

IMG_2227

Prepped veggies.

IMG_2228

Spinach salad ingredients.

IMG_2229

What a great dinner!

4 Step Chicken Marengo by Food Network

Ingredients

  • 3 large chicken cutlets, sliced into thin paillards (slice while partially frozen)
  • Kosher salt and freshly ground black pepper
  • 1/2 cup all-purpose flour (skipped this)
  • 3 tablespoons vegetable oil (used olive oil)
  • 1 medium sweet onion, sliced
  • 1/2 pound mushrooms, sliced
  • 1 yellow bell pepper, seeded and julienned
  • 2 tablespoons tomato paste
  • 1/2 cup white wine (used chicken broth)
  • 1/2 cup beef broth (used chicken broth)
  • 1 (14-ounce) can chopped tomatoes
  • 1/2 tablespoon butter

Directions

  1. Season the chicken with salt and pepper, to taste, and lightly dredge in flour.
  2. In a large sauté pan, heat the oil over medium-high heat and add the chicken. Brown on both sides, until nicely golden, about 3 minutes per side. Remove from the pan and set aside on a plate.
  3. In the same pan, add more oil, if needed, along with the onion, mushrooms and peppers and sauté until softened and fragrant, but not limp, about 5 minutes.
  4. Season with salt and pepper, to taste.
  5. Stir in the tomato paste and cook a few minutes to cook out the raw flavor.
  6. Turn up the heat, and add the wine/wine to deglaze the pan and let it reduce for 2 or 3 minutes.
  7. Add the beef broth and tomatoes.
  8. Once the mixture begins to bubble, add the browned paillards and any juices from the chicken and reduce the heat to a simmer.
  9. Cook until the chicken is warmed through, about 3 minutes.
  10. Turn the heat off and stir in the butter.
  11. Transfer to a serving platter and serve immediately.

Spinach and Citrus Salad with Sweet and Spicy Pecans

Ingredients

  • 3 cups fresh spinach, washed and dried, cut into chiffonade
  • 2 green onions, chopped
  • 1 orange, supremed and halved
  • 1 tablespoon butter
  • 1/2 teaspoon sugar
  • 1/2 cup pecan halves
  • 1 teaspoon dried rosemary
  • 1/4 teaspoon cayenne
  • Salt and freshly ground black pepper
  • Citrus Dressing, recipe follows

Directions

  1. Put the spinach and green onions in large salad bowl and sprinkle with the halved citrus supremes.
  2. In a small saute pan over medium heat, add the butter and sugar and stir until the butter is melted.
  3. Add the pecans and toss until the pecans begin to brown.
  4. Stir in the rosemary and cayenne and stir just a few seconds to release the aroma.
  5. Remove from the heat and season with salt and pepper, to taste.
  6. Sprinkle the pecans on the salad while still warm.
  7. Drizzle the dressing over salad and serve.

Citrus Dressing

  • 1 teaspoon Dijon mustard
  • 2 tablespoons orange or grapefruit juice (or a combination)
  • 3 tablespoons canola oil (used olive oil)
  • 1 tablespoon olive oil (omitted this tbs)
  • Salt and freshly ground black pepper

In a small bowl, add all the ingredients and whisk until emulsified.

Monday, April 26, 2010

Four Cheese Baked Penne

Who likes pasta?  I do!  Who likes cheese?  I do!  Who likes four cheese pasta from Self Magazine, so it’s somewhat light and healthy?  I do!  I do!

I actually made this recipe for the first time a few months ago, but I recently made it again and remembered that I never blogged about it.  How silly of me! 

This pasta is creamy, delicious and comes together fairly quickly.  By using reduced fat cheeses, it’s lighter than most pastas and when paired with a green salad, you’ve got a delicious and healthy meal.  Plus, it feeds a lot.  Both times that I’ve made this, I’ve cut the recipe in half and we’ve had leftovers for 2 days.  Surprise, surprise…when making this I actually didn’t make any substitutions!  Well, except I used dried parsley, instead of fresh parsley because why would I just buy fresh parsley…what would I use it for besides this?  Anyway, I recommend this yummy and cheesy pasta, if you’re looking for a lighter pasta option.

Enjoy!

IMG_2067 

Ingredients.

IMG_2068 

Hot out of the oven.

IMG_2069

Ready to eat.

Four Cheese Baked Penne, by Self.com

Serves 8

INGREDIENTS
  • 1 1/2 cups small-curd lowfat cottage cheese
  • 1 1/4 cups shredded part-skim mozzarella, divided
  • 1 cup part-skim ricotta
  • 3 tablespoons chopped fresh parsley
  • 1 pound whole-wheat penne
  • 2 teaspoons olive oil
  • 1 medium onion, chopped
  • 4 cloves garlic, chopped
  • 1 can (15 oz) crushed tomatoes
  • 1 can (8 oz) no-salt-added tomato sauce
  • 1 teaspoon dried oregano
  • 1 teaspoon dried rosemary
  • 3/4 teaspoon salt
  • 1/2 teaspoon red pepper flakes
  • 1/4 teaspoon freshly ground black pepper
  • Vegetable oil cooking spray
  • 1/4 cup shredded Parmesan
PREPARATION
  1. Heat oven to 400°.

  2. Combine cottage cheese, 1/2 cup mozzarella, ricotta and parsley in a bowl.

  3. Cook pasta until tender but still firm; drain.

  4. Heat oil in a large pot over medium heat. Add onion and cook, stirring occasionally, 5 minutes.

  5. Add garlic; cook, stirring, 30 seconds more.

  6. Add tomatoes, sauce, oregano, rosemary, salt, pepper flakes and pepper.

  7. Bring to a boil; reduce heat; simmer until sauce thickens slightly, about 10 minutes.

  8. Add pasta; turn off heat. Stir in cheese-parsley mixture.

  9. Coat a 9" x 13" glass baking dish with cooking spray; transfer pasta mixture to dish. Top with remaining 3/4 cup mozzarella and Parmesan.

  10. Bake until heated through and cheese melts, 30 minutes.

Monday, September 14, 2009

Chili

It’s fall and it’s football season!  Chili reminds me of both these things.  You can cozy up with a nice, hot bowl of chili and a piece of cornbread at the table.  Or you can enjoy it while watching the big game, or even better on a hot dog!

I really enjoy chili and I love how there are SO many recipes for it.  You can change everything in it!  The kind of meat you want, if you want meat at all, the kind of veggies, the kind of beans, the kind of spices…you name it, the possibilities are endless with chili.

I had some ground turkey in the freezer that needed to be used, so I decided that chili was the way to go.  I used my Better Homes & Gardens cookbook and though it’s not the best chili I’ve ever had (that would be from Claim Jumper…they have a steak chili that is a-mazing), it’s still pretty good!  Obviously, I used ground turkey instead of ground beef, I added a can of white beans, and I also added additional spices: cumin, garlic powder and pepper. I cooked mine in the Crockpot all day long, but you can easily make it on the stove as well.  So easy and so good.

Enjoy!

IMG_1840 

Ingredients.

IMG_1841 

All finished.

IMG_1843

Yum!

Chili, by Better Homes & Garden

  • 12 ounces ground ground beef
  • 1/2 cup chopped green pepper
  • 1 cup chopped onion (1 large)
  • 2 cloves garlic, minced
  • 1  8-ounce can tomato sauce
  • 1  15-ounce can red kidney beans, rinsed and drained
  • 1  14.5-ounce can diced tomatoes, undrained
  • 2  to 3 teaspoons chili powder
  • 1/2  teaspoon salt
  • 1/2  teaspoon dried basil, crushed
    1. In a large saucepan cook ground beef, onion, pepper and garlic until meat is brown and onion is tender; drain fat.
    2. Stir in beans, tomatoes, tomato sauce, chili powder, basil and 1/4 tsp black pepper.  Bring to a boil; reduce heat.  Simmer, covered, for 20 minutes.
    3. OR
    4. Throw it all in a crockpot before you go to work and then come home to a delicious smelling house and a pot of hot chili.

    Monday, August 24, 2009

    Alice Springs Chicken

    The Alice Springs Chicken from Outback Steakhouse is one of Jeremy’s favorite meals there.  For those of you who have never had it, it’s a grilled chicken breast that is marinated in a honey mustard sauce, topped with mushrooms, bacon and cheese.  I’ll admit…it’s pretty delicious and probably has a million calories in it! 

    In selecting our meals for the week, Jeremy chose Alice Springs Chicken and I told him that he was in charge of finding me a recipe.  Apparently, I trained him well because he found a great recipe from the fabulous, Recipezaar.   This recipe is very, very close to the real thing!  The honey mustard sauce is one of the best I’ve had (and I’m not even a huge fan of honey mustard) and the cheesy bacon on top is amazing.  When I made this tonight, I cut the recipe in half, used light cheese, and left out the mushrooms, since Jerm isn’t a fan of them.  The chicken breasts that I used were huge, so we both only ate half…which means we have leftovers for tomorrow.  Yum!  So, here’s another highly recommended meal from our kitchen.

    Enjoy!

    IMG_1766

    Ingredients.

    IMG_1768

    Hot out of the oven.

    IMG_1769

    Served with veggies and au gratin potatoes.  Yum!

    Now This is Alice Springs Chicken, by Recipezaar
    Ingredients
    • 1 cup Dijon mustard
    • 1 cup honey
    • 1 tablespoon canola oil
    • 1 teaspoon lemon juice
    • 4-6 boneless skinless chicken breasts
    • 1 tablespoon vegetable oil
    • 2 cups sliced mushrooms
    • 2 tablespoons butter
    • 1/2 teaspoon salt
    • 1/2 teaspoon pepper
    • 1/2 teaspoon paprika
    • 12 slices bacon, cooked
    • 3 cups shredded Mexican blend cheese
    • 2 teaspoons chopped fresh parsley
    Directions
    1. With an electric mixer combine the mustard, honey, and 1 Tbsp oil, and lemon juice for 1 minute.
    2. Pour 1/2 mixture over chicken in a gallon ziplock to marinate in fridge 2-24 hours.
    3. Chill remaining marinade to serve with chicken.
    4. After marinating chicken, preheat oven to 375°F Put remaining oil in frying pan. Heat and sear chicken on both sides.
    5. Transfer chicken to oven safe pan and brush with marinade.
    6. Meanwhile in frying pan add butter and sauté mushrooms.
    7. Season chicken breasts with salt and peppers.
    8. Stack bacon across each breast, spoon mushrooms on each breast and then approx 1/3- 1/2 cup cheese on each.
    9. Cover pan with foil and bake 7-10 minutes or until cheese is melted and bubbly. Sprinkle with parsley and serve with honey mustard marinade.

    Friday, August 7, 2009

    Corn Dog Muffins

    I love corn dogs!  Cornbread + hot dog + wooden stick = deliciousness!  Corn dogs are great to get the State Fair or amusement parks (specifically Disneyland California Adventure… amazing corn dogs there!), but how can you have them at home??  Well, you could buy the frozen or you can make these muffins!

    Growing up, I used to request that my parent buy the frozen kind, so that I could have a corn dog every once in a while.  Knowing my love for the meat on a stick, they brought me this recipe that they cut out of a magazine and now I’ve finally made them!  Boy, am I glad I did because they are SO good.  Jeremy even gave them the “two thumbs up” and stamp of approval.

    The recipe is so simple and quick.  I cut it in half and got 11 regular sized muffins out of it; plus, I used skim milk and light cheese.  Yum, yum, yum!  I ate my corn dog muffins with ketchup and mustard, which I think is a MUST for corn dogs, while Jerm ate his plain.  They were delicious!  If you’re a hot dog or corn dog lover, go make this recipe.  Seriously, go now.

    Enjoy!

    IMG_1751

    Ingredients.

    IMG_1752

    Corn dog muffins!

    Corn Dog Muffins

    Ingredients

    • 2 (8.5 oz) packages cornbread mix
    • 2 tbs brown sugar
    • 2 eggs
    • 1 1/2 cup milk
    • 1 cup grated Cheddar cheese
    • 9 hot dogs, cut into small pieces

    Directions

    1. Preheat oven to 400.  Lightly grease muffin tins.
    2. Stir together the cornbrea mix and the brown sugar in a large bowl.  Whisk the egg and milk in a small bowl until smooth.  Fold the eggs, cheese and hot dogs into the dry mixture until moistened.  Spoon mixture into muffins tins until 2/3 full.
    3. Bake for 14-18 minute or until gold brown.
    4. Serve with mustard and ketchup, or eat plain!

    Sunday, July 26, 2009

    Chicken Parmesan

    This Chicken Parmesan is a quick and easy recipe, from Robin Miller’s Quick Fix Meals.  A few years ago, Robin did a demonstration at a cooking store in the fabulous city (and my home) of Scottsdale (she and her family live there).  Once my parents and I heard about the event, we knew we were definitely going.  At the demo, she made tasty food, answered questions and of course, signed her cookbook.  This is one of my favorite cookbooks, not only because (so far) it’s my only autographed one, but also because I love Robin’s idea of “morphing” recipes to give you different meals through out the week.

    IMG_1720

    I’ve made this recipe a few times and it’s for sure a keeper.  The sauce is delicious and so easy to make.  Plus, it takes minutes to bread the chicken and throw every thing into the oven.  I only make two chicken breasts, so I cut the breading ingredients in half.  However, I do make all the sauce because I serve this with pasta and Jerm and I are saucy kind of people.  

    Enjoy!

    IMG_1712

    Ingredients.

    IMG_1715

    Pre-trip into the oven.

    IMG_1716

    Post-trip into the oven and served with pasta.

    Chicken Parmesan, by Robin Miller (Quick Fix Meals)

    Ingredients

    • One 14 oz. can crushed tomatoes
    • One 6 oz. can tomato paste
    • 2 tsp dried basil
    • 2 tsp dried oregano
    • 1 tsp garlic powder
    • 1/2 cup flour
    • 1/2 tsp salt
    • 1/4 tsp ground black pepper
    • 1 large egg, lightly beaten
    • 1/2 dry seasoned bread crumbs
    • 3 – 4 boneless skinless chicken breasts
    • 1 tbs olive oil
    • 1 cup shredded part-skim mozzarella cheese
    • 4 tsps grated Parmesan cheese

    Directions

    1. Preheat oven 400 degrees.  Coat baking dish with cooking spray.
    2. In a medium saucepan, combine the tomatoes, tomato paste, basil, oregano, and garlic powder.  Set over medium heat, bring to a simmer and let simmer until ready to use (about 10 minutes).
    3. In a shallow dish, combine the flour, salt and pepper.  Place eggs in a separate shallow dish and the bread crumbs in a third. 
    4. Dredge the chicken in the flour, evenly coating both sides and tapping off any excess.  Dip both sides of the flour-coated chicken in the egg and then in the bread crumbs.
    5. Heat oil in a large skillet over medium high heat.  Add the chicken to the hot pan and cook until golden brown, 2-3 minutes per side.
    6. Transfer chicken to the prepared baking dish.
    7. Top with tomato sauce, mozzarella an Parmesan.
    8. Cover with foil and bake 20 minutes.  Uncover and bake 5-10 minute, until the chicken is cooked thoroughly and the cheese is golden and bubbly.

    Sunday, July 12, 2009

    Classic Baked Ziti

    This a a pretty basic recipe but it's always a delicious one!  Usually when I'm making baked pasta, I just kinda throw together what I think sounds good (spaghetti type ingredients), add some cheese on top and throw it in the oven.  Well, last week Jeremy specifically requested "Baked Ziti," so that set me on a search for the recipe. 

    I used a recipe from my old standby, Recipezaar.  Whenever I search for a recipe on that website I always sort by "Rating," and this one was high up on the list.  It's simple, it's cheesy, it's Baked Ziti! :)  I cut the recipe in half since it was just for Jerm and me, and it turned out nicely.  Add some breadsticks and salad and you've got a delicious meal.  Definitely try it out if you're looking for easy and classic dinner. 

    Enjoy!

    IMG_1689 

    Ingredients.

    IMG_1690

    Pre-baked.

    IMG_1692

    Post baked.

    Classic Baked Ziti, by Recipezaar

    Ingredients

    • 1 lb lean ground beef
    • 1 cup onion, chopped
    • 2 cloves garlic, minced
    • 1 (32 ounce) jar meatless sauce
    • 1 cup chicken broth
    • 1 teaspoon dried oregano leaves
    • 1 (16 ounce) package ziti pasta, cooked and drained
    • 2 (8 ounce) cups shredded mozzarella cheese
    • 1 cup grated parmesan cheese
    Directions
    1. Preheat oven to 350 degrees F.
    2. In a large skillet, cook ground beef, onions, and garlic over medium-high heat for 6 to 8 minutes or until beef is browned; stirring frequently.
    3. Stir in spaghetti sauce, chicken broth, and oregano.
    4. Reduce heat and simmer for 10 minutes.
    5. Stir 1 cup of the sauce into the cooked ziti noodles.
    6. Spoon 1/2 of the ziti mixture into a 13x9x2-inch baking dish.
    7. Sprinkle with 1 1/2 cups mozzarella cheese and 1/2 cup Parmesan cheese.
    8. Top with 2 cups sauce, then remaining ziti mixture and remaining sauce.
    9. Cover and bake 20 minutes.
    10. Sprinkle with remaining mozzarella and Parmesan cheese.
    11. Return to oven and bake uncovered for 10 minutes or until heated through.

    On a quick side note, I' like to thank finsmom for giving me this lovely award!  I've never gotten a blog award before.  "You like me...you really like me!"  Who knew that people other than my mom, my husband, and my in-laws read my blog! :)  Thank you!!

    These are the rules of this award:

    1. Accept the award, post it on your blog together with the name of the person who has granted the award, and his or her blog link.
    2. Pass the award to 15 other blogs that you’ve newly discovered.
    3. Remember to contact the bloggers to let them know they have been chosen for this award.
    I think 15 is A LOT, so I'm not going to have quite that many...7 is a good number...how about 7?  Therefore, I would like to pass this award on to the following great blogs:

    Stacy Runs

    Baked Perfection

    My Baking Addiction

    Iowa Girl Eats

    My Kitchen Cafe

    Loves to Eat

    Latest Addictions

    Saturday, June 13, 2009

    Flatout Wrap Pizzas

    Have any of you tried Flatout Wraps?  They are flatbread/wraps that only have 100 calories and are delicious.  You can create so many tasty meals with them.  Cold wraps, grilled wraps, quesadillas, pizzas and so much more!  Jerm and I aren't renewing our Costco membership (because Sam's Club is less than 5 minutes away) so before it expired we went shopping.  I'd heard about this bread before and since we'd never be back to Costco I thought, "What the heck?  Let's buy some!"

    So, last week I made Flatout Wrap pizzas and they were yummy!  The bread gets nice and crispy, just like a thin crust pizza, and of course, toppings are endless.  I made 3 different kinds of pizza for our dinner: BBQ chicken, Hawaiian, and Chicken Broccoli.  Yum!  I highly recommend these wraps and making them as pizzas; plus, for only 100 calories they can't be beat!

    Enjoy!

    IMG_1642

    Ingredients.

    IMG_1643 

    About to go into the oven.

    IMG_1645

    All melty and halfway eaten.

    BBQ Chicken Flatout Wrap Pizza

    Ingredients

    • 1 Flatout Wrap (we used Multi-grain)
    • 1/4 cup BBQ sauce + about 1-2 tbs additional
    • Mozzarella cheese
    • 1/2 cup cooked, chopped chicken breast
    • 2 sliced cooked bacon
    • Pineapple pieces, small

    Hawaiian Flatout Wrap Pizza

    Ingredients

    • 1 Flatout Wrap
    • 1/4 cup marinara sauce
    • Mozzarella cheese
    • 3 slices of deli ham
    • Pineapple pieces, small

    Chicken and Broccoli Flatout Wrap Pizza

    Ingredients

    • 1 Flatout Wrap
    • 1/4 cup marinara sauce
    • Mozzarella cheese
    • 1/2 cup cooked, chopped chicken breast
    • 1/2 cup frozen broccoli florets (thawed out in microwave)
    • Dash of garlic salt

    Directions (for all pizzas)

    1. Pre-heat oven to 350.  Lay Flatout Wrap on a nonstick cookie sheet.  Bake for 7 minutes.
    2. Spread sauce on Flatout Wrap, leaving about 3/4 inch edge.
    3. Top with cheese and toppings.
    4. Bake for 15 minutes.

    Saturday, May 2, 2009

    "Healthified" Lasagna

    A few days ago, we had Jayla over for dinner and it was my chance to make a meal with more than two servings.  Usually when its just Jeremy and me, I only make enough food for two people, plus one left over.  I love having people over because then I can either make the whole dish or at least not have to divide it up. 

    Anyway, I get emails of recipes from the Betty Crocker and this was in one of them.  It's a very easy and delicious lasagna...plus, it's on the "lighter" side.  When I made this I couldn't find Muir Glen pasta sauce, so I used Paul Newman's Tomato Basil sauce.  Also, I was out of dried basil, so I substituted oregano.  My only recommendation (per Jeremy) for this recipe was to add a bit more sauce, as we like our sauce and it dried out just a bit, when we had leftovers.

    Enjoy!

    IMG_1533

    Ingredients.

    IMG_1534

    Pre-baked.

    IMG_1540

    Post-baked and eaten. :)

    Healthified Lasagna, by Betty Crocker

    Makes 12 servings

    • 9 uncooked lasagna noodles
    • 1lb extra-lean (at least 90%) ground beef
    • 2 cloves garlic, finely chopped
    • 1 jar (25.5 oz) Muir Glen® organic Italian herb pasta sauce
    • 1/8 teaspoon ground red pepper (cayenne)
    • 1 1/2 teaspoons dried basil leaves
    • 1 egg
    • 1 container (15 oz) reduced-fat ricotta cheese
    • 2 cups shredded reduced-fat mozzarella cheese  8 oz)
    • 1/3 cup shredded Parmesan cheese
    1. Spray 13x9-inch (3-quart) glass baking dish with cooking spray. Cook and drain noodles as directed on package. Place in cold water.
    2. Meanwhile, in 12-inch skillet, cook beef and garlic over medium-high heat 5 to 7 minutes, stirring frequently, until beef is thoroughly cooked; drain. Stir in pasta sauce, ground red pepper and 1 teaspoon of the basil. Heat to boiling, stirring occasionally. Remove from heat.
    3. Heat oven to 350°F. In medium bowl, beat egg slightly. Stir in ricotta cheese and remaining 1/2 teaspoon basil until blended. Drain noodles. Spread about 1/2 cup sauce mixture over bottom of baking dish. Top with 3 noodles, 1 1/2 cups of the sauce mixture, half of the ricotta mixture and 3/4 cup of the mozzarella cheese. Repeat layers once. Top with remaining noodles, sauce and mozzarella cheese; sprinkle with Parmesan cheese. Spray 15-inch piece of foil with cooking spray. Cover lasagna with foil.
    4. Bake 45 minutes. Uncover; bake 10 to 15 minutes longer or until bubbly. Let stand 10 minutes before serving.

    High Altitude (3500-6500 ft): In step 4, uncover and bake 15 to 20 minutes longer.

    Nutrition Information:  1 Serving: Calories 240 (Calories from Fat 80); Total Fat 9g (Saturated Fat 4 1/2g, Trans Fat 0g); Cholesterol 60mg; Sodium 400mg; Total Carbohydrate 21g (Dietary Fiber 2g, Sugars 5g); Protein 20g Percent Daily Value*: Vitamin A 15%; Vitamin C 2%; Calcium 25%; Iron 10% Exchanges: 1 Starch; 1/2 Other Carbohydrate; 0 Vegetable; 2 1/2 Lean Meat Carbohydrate Choices: 1 1/2
    *Percent Daily Values are based on a 2,000 calorie diet.

    Sunday, April 26, 2009

    Delicious Chicken Pot Pie

    I only have one word for this recipe...YUM!  We love this chicken pot pie and it has quickly become a favorite meal in our house.  I've made this for my parents and for friends, and everyone loves it.  Before making this recipe, I'd never had chicken pot pie, but now I know it's a delicious meal!

    This recipe is another from the fabulous website of Recipezaar.com.  It's easy to put together and I usually like to prep the veggies ahead of time, so I can just throw it all together and bake it.  I use store bought pie crust (because it's easy and tasty!), cut back the chicken to 2 cups and as usual, use whole wheat flour and skim milk.  I highly recommend this pot pie...it's amazing.

    Enjoy!

    IMG_1525[2]

    Ingredients.

    IMG_1526[2]

    Prepped veggies.

    IMG_1528[2]

    Pre-bake.

        IMG_1529[2]

    Post baked and after we ate some. :)

    Delicious Chicken Pot Pie, by Recipezaar
    Ingredients
    • 1 cup potato, diced
    • 1 cup chopped onion
    • 1 cup celery, diced
    • 1 cup chopped carrot
    • 1/3 cup melted margarine
    • 1/2 cup all-purpose flour
    • 2 cups chicken broth
    • 1 cup half-and-half
    • 1 teaspoon salt
    • 1/4 teaspoon pepper
    • 4 cups chopped cooked chicken
    • 2 pie crusts (either store bought or your own recipe)
    Directions
    1. Preheat oven to 400°F.
    2. Sauté onion, celery, carrots and potatoes in butter for 10 minutes.
    3. Add flour to sautéed mixture, stirring well Cook one minute stirring constantly.
    4. Combine broth and half and half.
    5. Gradually stir into vegetable mixture.
    6. Cook over medium heat stirring constantly until thickened and bubbly.
    7. Stir in salt and pepper; add chicken and stir well.
    8. Pour into shallow 2 quart casserole dish and top with pie shells.
    9. Cut slits to allow steam to escape.
    10. Bake for 40-50 minutes or until pastry is golden brown and filling is bubbly and cooked through.

    Thursday, April 23, 2009

    Flash Roasted Crispy Ranch Chicken

    Let me just start out by saying that if you like ranch dressing and tortilla chips, you have to try this recipe.  This chicken is so quick, easy and most of all delicious!  When I went to college, my mom got me a Campbell’s Soup cookbook that is filled with quick and easy recipes.  This is definitely my favorite recipe from the book! 

    The chicken is breaded in a ranch/cream of chicken soup mix, then coated with tortilla chips and baked in the oven.  Delicious and so simple!

    Enjoy!

    IMG_1523

    Ingredients.

     IMG_1524[6]

    Served with brown rice and veggies.  Yum!

    Campbell’s Flash Roasted Crispy Ranch Chicken

    Ingredients

    • 1 (10 3/4 ounce) can cream of chicken soup
    • 1/2 cup milk
    • 1 (1 ounce) envelope ranch dressing mix, I use Hidden Valley
    • 1 lb boneless skinless chicken breast half, about 4
    • 1 1/2 cups tortilla chips, finely crushed
    • 1-2 tablespoon butter, melted

    Directions

    1. In a shallow dish mix soup, milk and dressing mix.  Reserve 1 c for sauce.
    2. Dip chicken into soup mixture.
    3. Coat with tortilla chips.
    4. Place chicken on a greased baking sheet.
    5. Drizzle with margarine or butter.
    6. Bake at 400 degrees F for 20 min or until chicken is no longer pink.
    7. In a small saucepan over med heat or microwave, heat reserved soup mixture to a boil.  Serve over or with chicken.

    Sunday, April 12, 2009

    BBQ Chicken Pizza

    Hello blog world!  I'm sorry that I've been MIA lately, but our new puppy has been keeping us pretty busy.  I've been taking pictures of the meals that I've made, but I just haven't found the time to blog about them...until now.

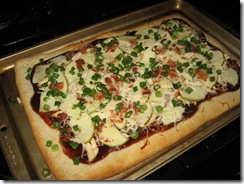
    So, getting back in action, I present to you a delicious BBQ Chicken Pizza!  I love pizza and I love BBQ sauce, so whoever created the idea of BBQ Chicken Pizza is a hero in my book.  This recipe is from Sandra Lee's Semi-Homemade on Food Network.  Unlike a traditional BBQ Chicken Pizza, this one has sliced apples and bacon bits on top, which adds a great texture to it.  I've made this a few times and Jeremy and I love it.  I've always cooked it in the oven, as opposed to cooking it on the grill, as the recipe directs but I get it'd be great and crispy that way.  Use your favorite BBQ sauce and add any additional toppings that you'd like.  Cilantro goes great on BBQ Chicken Pizza! 

    Enjoy!

    IMG_1417

    Ingredients.

    IMG_1419[2]

    Pre-baked.

    IMG_1420

    Post-baked.

    IMG_1421 

    Ready to eat!

    BBQ Chicken Pizza, by Sandra Lee

    Ingredients

    • 1/2 pound chicken cutlets
    • 1 tablespoon vegetable oil
    • Salt and pepper
    • 1 (13.8-ounce) can refrigerated pizza dough (recommended: Pillsbury)
    • 1 cup BBQ sauce
    • 2 cups shredded mozzarella cheese
    • 1 cup green apple, sliced
    • 1/4 cup real bacon bits
    • 2 green onions, sliced

    Directions

    1. Set up grill for direct cooking over medium-high heat. Oil grate when ready to start cooking.
    2. Brush chicken with vegetable oil, season with salt and pepper. Place chicken on the grill and cook until done, about 2 minutes per side. When done, slice into 1-inch pieces, reserve.
    3. Spray a perforated disposable cookie sheet with nonstick cooking spray. Carefully remove pizza dough from can. Unroll dough and place on cookie sheet on the grill. Let cook 2 minutes and turn pizza over.
    4. Spread BBQ sauce over pizza leaving a 1-inch border. Next, top with mozzarella cheese, diced apples, chicken, and bacon pieces.
    5. Cover with grill lid and cook 5 minutes until cheese is melted and bubbly.
    6. Serve hot, topped with green onions.
    7. Cook's Note: Cooking indoors: Preheat oven to 425 degrees F. Lightly spray baking sheet with cooking spray; set aside. Carefully unroll dough and place on prepared baking sheet. Press out dough with clean hands to form 13 by 9-inch rectangle. Use oven mitts to place baking sheet in preheated oven. Bake in for 7 minutes or until crust just begins to brown. Use oven mitts to remove crust from oven and top as directed. Use oven mitts to return to oven for 8 to 10 minutes or until golden brown and cheese is melted and has begun to bubble.

    Wednesday, April 1, 2009

    Steak Sandwich

    Last night for dinner, Jeremy and I decided to have Philly Cheesesteaks.  I've only eaten a Philly Cheesesteak about twice in my life, but they sure are delicious.  This wasn't exactly a Philly cheesesteak though, it was more just a steak sandwich...but it was yummy and it's the thought that counts right?

    For this dinner, I just kinda "winged" it, and I was pleasantly surprised by the outcome.  I'm sure you could add more spices and more ingredients to jazz it up a bit; however, we enjoyed this simple, cheesy steak sandwich, and it'll definitely appear on our menu again.

    Enjoy!

      IMG_1412

    The cooked steak.

     IMG_1413[2]

    Grilled onions.

     IMG_1414[2]

    Hot out of the broiler.

      IMG_1415[2]

    I served mine open-faced, with fries and fruit.

    Steak Sandwich, by Me

    Ingredients

    • Steak (I used boneless ribeye)
    • 1/3 of a large onion, sliced
    • Olive oil
    • Salt and pepper
    • Provolone cheese
    • Hamburger buns

    Directions

    1. Season steak with salt and pepper.  Heat olive oil in a frying pan to medium high.  Grill steak until desired wellness.  Remove from pan and set aside.
    2. In same pan, grill onions until desired likeness.
    3. Place steak and onion on hamburger buns.
    4. Top with provolone cheese.
    5. Broil for a few minutes until the cheese is melted.

    Monday, March 23, 2009

    Grown Up Mac and Cheese

    As I mentioned before, I love Food Network.  I'll be honest and say that I'm not an extremely huge fan of Ina Garten, the Barefoot Contessa.  I'll watch her if she's on, but something about her is just odd to me.  Plus, most of her recipes have about one million calories in them...and I usually try to avoid food like that. 

    Well, one day the Barefoot Contessa happened to be on and Jeremy and I ended up watching it.  On the episode, she made a "Grown Up Mac and Cheese" that looked pretty dang good!  Jeremy requested that I make so I did. 

    This is a delicious Mac and Cheese with some complex flavors from the three different cheeses and the bacon in it.  That's right...there's bacon in it too.  Yum!  The first time I made it, I followed the recipe to a "t," and I found the blue cheese flavor to be a bit strong for my taste.  I recently made it again with a milder blue cheese and it was FANTASTIC!  The bubbly cheese, the crisp bacon and the crunchy breadcrumb topping = simply amazing! 

    As usual, I used skim milk and whole wheat flour.  Plus, I didn't feel like making fresh breadcrumbs, so I just used store bought kind, and I cooked the bacon in the microwave like I normally do.  Please note that this recipe say it serves 2 people...yea well, maybe if those 2 people can eat a TON of pasta.  Seriously Ina, what are you thinking?!  I've found that this recipe can very easily feed a group of 4 or at least give me and Jeremy dinner for two days.  Enjoy!

    IMG_1397

    Ingredients.

    IMG_1398

    Prepping.

    IMG_1399

    In the oven cooking.  (I forgot to get a picture before we ate it, so just imagine it looking bubbly and having golden crumbs on top.)

    Grown Up Mac and Cheese by Ina Garten

    Directions

    • 4 ounces thick-sliced bacon
    • Vegetable oil
    • Kosher salt
    • 2 cups elbow macaroni or cavatappi
    • 1 1/2 cups milk
    • 2 tablespoons unsalted butter
    • 2 tablespoons all-purpose flour
    • 4 ounces Gruyere cheese, grated
    • 3 ounces extra-sharp Cheddar, grated
    • 2 ounces blue cheese, such as Roquefort, crumbled
    • 1/4 teaspoon freshly ground black pepper
    • Pinch nutmeg
    • 2 slices white sandwich bread, crusts removed
    • 2 tablespoons freshly chopped basil leaves

    Directions

    1. Preheat the oven to 400 degrees F.
    2. Place a baking rack on a sheet pan and arrange the bacon in 1 layer on the baking rack. Bake for 15 to 20 minutes, until the bacon is crisp. Remove the pan carefully from the oven - there will be hot grease in the pan! Transfer the bacon to a plate lined with paper towels and crumble when it is cool enough to handle.
    3. Drizzle oil into a large pot of boiling salted water. Add the macaroni and cook according to the directions on the package, 6 to 8 minutes. Drain well.
    4. Meanwhile, heat the milk in a small saucepan, but don't boil it. Melt the butter in a medium pot and add the flour. Cook over low heat for 2 minutes, stirring with a whisk. While whisking, add the hot milk and cook for a minute or 2 more, until thickened and smooth. Off the heat, add the Gruyere, Cheddar, blue cheese, 1 teaspoon salt, pepper, and nutmeg. Add the cooked macaroni and crumbled bacon and stir well. Pour into 2 individual size gratin dishes.
    5. Place the bread slices in a food processor fitted with a steel blade and pulse until you have coarse crumbs. Add the basil and pulse to combine. Sprinkle the bread crumb mixture over the top of the pasta. Bake for 35 to 40 minutes, or until the sauce is bubbly and the macaroni is browned on the top.

    Tuesday, March 17, 2009

    Chicken Tortilla Soup

    Alright, I'm back!  Sara's Sweets is back up and running.  I'm back from vacation and only have 2 more weekend trips for work, so I'm back in the kitchen cooking dinners and baking.

    This recipe is a another favorite in our house and comes from the fabulous website: Recipezaar.  Some Tortilla Soups can be very brothy with just chunks of chicken...well, that's not what I prefer.  I like my Tortilla Soup to be on the thicker side, creamy and chunky, which is exactly what this soup is.  Plus, this soup is fairly easy to throw together.  The most complicated part is chopping up the vegetables, while the rest of it is mainly just stirring. 

    When I made this the other night, I decided not to add the chicken, I cut back on the amount of chicken broth (because I ran out), I added one can of black beans (because I like them) and I used skim milk (as usual).  It still turned out great, so this recipe has a lot of flexibility.  Try adding some corn, kidney beans, jalapeno, whatever you like.  Also, one this to be aware of with Tortilla Soup is that the more tortillas you add, the thicker the soup will be.  Therefore, I'd recommend starting with about 5 tortillas and work up from there, depending on your likeness.

    Enjoy this delicious recipe!

     IMG_1391[2]

    Ingredients.

     IMG_1392[2]

    Veggies sautéing.

     IMG_1393[5]

    Cut up tortillas, ready to jump into the pot.

     IMG_1394[2]

    All finished and ready to eat!

    Chicken Tortilla Soup by Recipezaar

    Ingredients

    • 1 cup carrot, diced
    • 1 cup celery
    • 1 cup onion, diced
    • 1/2 teaspoon garlic powder, diced or 1 fresh garlic clove, diced
    • 1/8 teaspoon salt
    • 1/4 teaspoon pepper
    • 2 tablespoons corn oil
    • 4 (15 ounce) cans chicken broth
    • 1 (15 ounce) can tomatoes, diced (optional)
    • 1 (10 ounce) can Rotel tomatoes & chilies, diced
    • 1 (1.25-1 1/2 ounce) packet taco seasoning
    • 1 (10 count) package corn tortillas (broken or cut into small pieces)
    • 12 ounces chicken meat, poached, diced
    • 1 cup milk
    • 12 ounces Monterey jack cheese or Mexican blend cheese, shredded
    • corn tortilla chips, broken into small pieces

    Directions

    1. Sauté carrots, onions, celery in corn oil, garlic, salt and pepper until tender.
    2. Add chicken broth and bring to boil.
    3. Add tomatoes, Rotel, taco seasoning, and chicken.
    4. Cut Tortillas into small pieces and add to broth mixture.
    5. Let boil for 20 minutes or until tortillas are thoroughly incorporated into soup stirring occasionally to keep from sticking.
    6. Reduce heat and add 8 oz. cheese. Simmer for additional 10 minutes.
    7. Add milk and simmer for additional 10 minutes.
    8. If thicker soup is desired, add more diced tortillas and let incorporate into soup.
    9. Garnish with shredded cheese and broken tortilla chips.