Showing posts with label Recipezaar. Show all posts

Tuesday, November 16, 2010

Pumpkin Gingerbread Loaf

Before I started this cooking/recipe blog, I used to occasional post recipes on my “other” blog.  This is a repost from that blog, but when I made this bread the other night I realized that it wasn’t on this blog!  This recipe is delicious and a must for fall baking, so I felt it necessary to to share.

Ever since the first day of Fall last week, a lot of the foodie blogs that I read have been posting pumpkin recipes.  I LOVE pumpkin!  So, I was inspired to jump on the pumpkin bandwagon and bake something scrumptious. 

This afternoon I baked this incredible Pumpkin-Gingerbread Loaf.  I've always loved regular pumpkin bread (thanks to my mom at Christmas time) and this bread adds the ginger element, which just makes it outstanding.  It's moist and comforting with the pumpkin flavor and then it's got a slight ginger kick.  YUM!  I could easily eat half a loaf or 3-4 muffins...it is THAT good.


IMG_0919[2]


I found the recipe a few years ago on Recipezaar.  Since I'm always trying to make recipes a bit healthier, I cut back on the sugar by 1/2 a cup, used whole wheat flour and subbed half egg whites for the eggs.  It's not much of a "healthy" modification, but I figured even a little bit could make it more figure friendly.  The recipe makes 2 big loafs (9-inch pans).  I like to make 1 loaf and 12 muffins, so that I can have somewhat of portion control. :)  It also freezes really well.  If you decide to do muffins, they'll take about 22 minutes to bake.  Seriously, you have to make this bread...it is AMAZING and a wonderful Fall treat!


   IMG_0916

Ingredients.

IMG_0917

12 muffins, minus 1 due to Quality Assurance. :)

Pumpkin Gingerbread Loaf by Recipezaar

Printer-Friendly Version

  • 1 cup margarine/butter
  • 3 cups sugar
  • 4 eggs
  • 3 1/3 cups flour
  • 2 teaspoons baking soda
  • 1/2 teaspoon baking powder
  • 1 1/2 teaspoons salt
  • 1 teaspoon cinnamon
  • 1 teaspoon nutmeg
  • 4 teaspoons ginger
  • 1/2 teaspoon cloves
  • 2/3 cup water
  • 2 cups canned pumpkin
  • 1 cup nuts (optional)
Directions
  1. Cream together margarine, sugar, and eggs.

  2. Combine all dry ingredients and add to creamed mixture alternately with water and pumpkin.

  3. Beat well.

  4. Pour into 3 well greased loaf pans.

  5. Bake at 350 degrees for 55-60 minute or until toothpick comes out clean.

Saturday, July 31, 2010

CSN Stores GIVEAWAY & Cinnamon Rolls

Those wonderful people at CSN Stores have done it again.  They are allowing me to host a GIVEAWAY on my blog to one of you lovely readers!  Awesome, right?

CSN features over 200+ stores with tons of products at incredible prices.  They offer le creuset cookware, furniture, pet products, outdoor products and so much more.   But what are they offering you, you ask?  CSN has graciously offered to give one of my readers a $50 gift card in the form of a promotional code that can be used on any product on their site....yippee!

I’ll be randomly selecting one lucky reader to win this GIVEAWAY!  There are 5 ways to enter and all entries must be received by midnight (AZ Time) on Friday, August 6th and here’s how you enter:

  1. Leave a comment telling me what you would spend your $50 gift card on at CSN Stores

  2. Follow ME on Twitter @saraboff

  3. Follow CSN on Twitter @csnstores

  4. Follow MY DOG on Twitter @dieselboff (he’s pretty funny!)

  5. Become a Follower of Sara’s Sweets

*If you become of follower on Twitter or on Google Reader, leave separate comments to let me know.

Alright now let’s get onto today’s recipe because it sure is a good one!  About a week ago while at work, I got the sudden urge to make cinnamon rolls.  It was really weird.  I haven’t eaten a cinnamon roll in quiet awhile and I’ve never made cinnamon rolls before, but knowing that I had a packet of yeast at home, I figured, why not!

In my search for a recipe, I found 2 that I liked.  I selected the recipe below because it had great reviews, but I liked the “overnight” technique of this recipe by Alton Brown of Food Network, especially since my plan was to take them into work in the morning. 

My only  modification to the recipe was that I used whole wheat flour and light cream cheese.  You see, using those two ingredients completely cancels out all the calories from the 3 sticks of butter that are in this recipe.  Really, they do! 

Speaking of the 3 sticks of butter, I’m not gonna lie….they are totally worth it!  These cinnamon rolls were light in texture, flavorful in the cinnamon/sugar filling and rich in the frosting.  Pretty much they were amazing!  Right after they came out of the oven, I took them to work, so my co-workers could experience them being warm and gooey…that’s when cinnamon rolls are best, right?  I set them on the counter at 7am and the pan was wiped clean by 7:30am.  No joke!  Food goes fast in my office, but I’ve never seen it go that fast before.  In fact, I almost didn’t get to try one!  If I hadn’t moseyed into the kitchen for coffee at 7:20am, my chance to try these beauties almost ceased to exist!  If my co-workers didn’t love me already, I’m 99.9% certain that they love me now that I brought them cinnamon rolls.

Enjoy!

   IMG_2297

Ingredients.

IMG_2298

Rolled out dough.

IMG_2299

About to go in the oven.

IMG_2300

Out of the oven.

IMG_2301

Frosted with copious amounts of icing!

Cinnabon Cinnamon Rolls by Recipezaar (newly named Food.com)

Printer-friendly Version

Ingredients
  • 1 ( 1/4 ounce) package dry yeast
  • 1 cup warm milk
  • 1/2 cup granulated sugar
  • 1/2 cup margarine
  • 1 teaspoon salt
  • 2 eggs
  • 4 cups flour
Filling
  • 1 cup packed brown sugar
  • 2 1/2 tablespoons cinnamon
  • 1/2 cup margarine, softened
Icing
  • 8 tablespoons margarine
  • 1 1/2 cups powdered sugar
  • 1/4 cup cream cheese
  • 1/2 teaspoon vanilla
  • 1/4 teaspoon salt

Directions

  1. For the rolls, dissolve the yeast in the warm milk in a large bowl.
  2. Add sugar, margarine salt, eggs, and flour, mix well.
  3. Knead the dough into a large ball, using your hands dusted lightly with flour.
  4. Put in a bowl, cover and let rise in a warm place about 1 hour or until the dough has doubled in size.
  5. Roll the dough out on a lightly floured surface, until it is approx 21 inches long by 16 inches wide.
  6. It should be approx 1/4 thick.
  7. Preheat oven to 400 degrees.
  8. To make filling, combine the brown sugar and cinnamon in a bowl.
  9. Spread the softened margarine over the surface of the dough, then sprinkle the brown sugar and cinnamon evenly over the surface.
  10. Working carefully, from the long edge, roll the dough down to the bottom edge.
  11. Cut the dough into 1 3/4 inch slices, and place in a lightly greased baking pan.
  12. Bake for 10 minutes or until light golden brown.
  13. While the rolls are baking combine the icing ingredients.
  14. Beat well with an electric mixer until fluffy.
  15. When the rolls are done, spread generously with icing

Monday, June 14, 2010

M&M Dream Bars

Hello friends, have you ever thought you blogged a post, only to find out 3 days later that it never went through?  That's what happened to me.  I thought I posted this on Friday, but just realized that it never went through due to a server error!  And here I was thinking that just no one was reading my blog. :)  Well, here is another tasty, sweet treat for you! We had a graduation BBQ at my work last month for those students, that work in our office, who graduated. As usual, I signed up to bring a dessert (does that surprise anyone?).

I’ve made this recipe a couple of times before, as it’s any easy go-to-dessert, plus it’s delicious. The first time I made these bars, I took them to my friend Alli’s parent’s Christmas party (easily jazzed up with red and green M&Ms)…and I’m proud to say that her mom requested the recipe and they are now a yearly additional to the dessert table! :)

These bars are sweet, chocolaty, nutty and are like a big oatmeal cookie! There is a layer of sweet gooiness in the middle that really amps up the recipe from other bars. I love them! They are fabulous…and of course, they were all eaten up by my co-workers!

Enjoy!
Ingredients.
Bottom “crust” layer.
Gooey deliciousness.
Right out of the oven.
Mmmm.
  

Ingredients

  • 2 cups oatmeal

  • 1 cup firmly packed brown sugar

  • 1 1/2 cups all-purpose flour

  • 1/2 cup coconut

  • 1 teaspoon baking soda

  • 1/2 teaspoon salt

  • 1 cup melted butter

  • 1 (14 ounce) can sweetened condensed milk

  • 1/2 cup peanut butter

  • 1 cup M&M' 

  • 1 cup chocolate chips  
Directions
  1. Combine oatmeal, brown sugar, flour, coconut, baking soda, and salt; add melted butter and stir until moist (the mixture will be crumbly). Reserve 1 1/2 cups and press remaining crumbs into a greased 13X9-inch baking pan (I line the pan with non-stick foil.). 
  2. Bake 12 minutes at 375°F. 
  3. Combine milk and peanut butter; carefully spread over baked crust. Sprinkle on M&M's and chocolate chips. Sprinkle reserved crumbs over chocolate pieces and lightly press crumbs down. 
  4. Bake 20 minutes, or until golden brown. Cool completely before cutting. 

Tuesday, May 25, 2010

The Most Amazing Carrot Cake

What’s up, doc?

bugs-bunny-forever1

Carrot cake is probably my most favorite cake.  It’s delicious and it’s got carrots in it, so it’s totally healthy and fat free, right? :)  My dad loves carrot cake, so for his birthday last month I baked him one!

This is by far, the best carrot cake  that I’ve ever had!  It’s flavored with the perfect amount of spice and it is filled with carrots (of course), pineapple, coconut and pecans.  Plus, when paired with a cream cheese frosting…oh my…it’s pure heaven! 

I’ve made this recipe a few times and surprisingly, I don’t make any changes to it.  Something weird happened when I made it for my dad though.  I’m pretty sure that I was paying attention and using all the right measurements, but for some reason my batter was very dry and tough to stir.  I added a few tablespoons of skim milk to smooth it out, and the cake turned out fine and delicious…but it was just weird.  I still don’t know what happened.  Oh well.  If you have a carrot cake lover in the family or if you just want to try the most delicious carrot cake on the planet, I recommend this recipe.

Enjoy!

 IMG_2191

Ingredients.

IMG_2192

Just call me “Sara Lee.”

IMG_2193

After I “fixed” the batter.

IMG_2194

Frosting ingredients.

IMG_2195

Cooling cakes.

IMG_2198

Ta-da!

IMG_2199

Mmmm.

Carrot Cake, by Recipezaar

  • 2 cups all-purpose flour
  • 2 teaspoons baking soda
  • 1 teaspoon baking powder
  • 1 teaspoon salt
  • 2 teaspoons ground cinnamon
  • 1 3/4 cups white sugar
  • 1 cup vegetable oil
  • 3 eggs
  • 1 teaspoon vanilla extract
  • 2 cups shredded carrots
  • 1 cup flaked coconut
  • 1 cup chopped walnuts
  • 1 (8 ounce) can crushed pineapple, drained

Wilton Cream Cheese Frosting

  • 1 (8 ounce) package cream cheese, softened

  • 1/2 cup butter, softened
  • 3 1/2 cups powdered sugar
  • 1 tsp vanilla extract
    Directions
    1. Preheat oven to 350 degrees F. Grease and flour a 9x13 inch pan or 2 round 9 inch pans.
    2. Mix flour, baking soda, baking powder, salt and cinnamon; make a well in the center and add sugar, oil, eggs and vanilla. Mix with wooden spoon until smooth.
    3. Stir in carrots, coconut, walnuts and pineapple. Pour into 9x13 inch pan and bake for about 45 minutes, or in round pans for 35 – 40 minutes.  Don't panic, the centre will sink a little.
    4. Allow to cool; when cool, frost the cake.
    5. To make the frosting: Cream the butter and cream cheese until smooth; add the icing sugar and beat until creamy.

    Saturday, April 10, 2010

    Hawaiian Cake

    Boy, do I have a delicious cake recipe for you!  For Easter, Jeremy, Diesel and I went down to my parents house for dinner and you know I was all about making the dessert.  My grandma’s birthday was in a few days, so I thought a cake would be perfect.  More specifically, I thought this cake would be perfect!  My parents just back from a Hawaiian vacation, we’re Hawaiian and it’s delicious.

    This cake is very simple to put together and would be great for get togethers or a pot-luck or a birthday celebration.  It is yellow cake, topped with a layer of pudding and pineapple, then frosted with Cool Whip and coconut.  Yummy!  Make this for your next party.  Seriously, it’s a-mazing.

    Enjoy!

    IMG_2142

    Ingredients.

     IMG_2143

    Pineapple layer.

    IMG_2144

    Frosted.

    IMG00001-20100404-1644

    Ready to eat!

    Hawaiian Cake, by Recipezaar
    Ingredients
    • 1 (18 1/4 ounce) package yellow cake mix

    • 3 eggs (or as called for by your cake mix)
    • 1/3 cup oil (or as called for by your cake mix)
    • 1 1/3 cups water (or as called for by your cake mix)
    • 1 1/4 cups cold milk
    • 1 (3 1/2 ounce) package instant vanilla pudding
    • 1 (20 ounce) can crushed pineapple, drained
    • 8 ounces Cool Whip (standard size)
    • 1 (3 ounce) package cream cheese, softened
    • 1/4 cup sugar
    • 1/2 teaspoon vanilla extract
    • 1/2 cup flaked coconut, toasted
    Directions
    1. Prepare and bake the cake according to package directions, using a greased 13 in x 9 in x 2 in baking pan.
    2. Cool.
    3. In a bowl, whisk together milk and pudding mix; let stand to thicken.
    4. Stir in pineapple.
    5. Spread over cake.
    6. In a mixing bowl, beat cream cheese, sugar and vanilla until smooth.
    7. Beat in 1 cup whipped topping.
    8. Fold in remaining topping.
    9. Spread over Pudding.
    10. Sprinkle with coconut.
    11. Cover and refrigerate for 3 hours or overnight.

    Friday, March 12, 2010

    Chocolate Toffee Candy

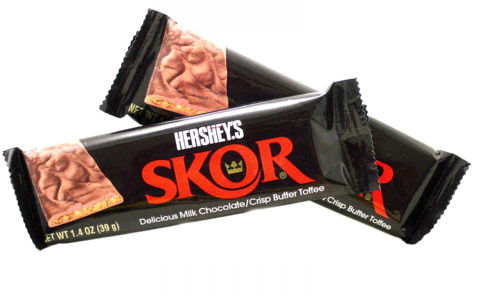
    Hello blog readers!  I hope you are all doing well.  Today I present you with one of the easiest and most delicious recipes ever!  Have you ever had a Skor candy bar?  Well, if you haven’t, I highly encourage you to go to the store and buy one right now because they are delicious.  According to the Hershey website, “with buttery toffee enrobed in milk chocolate, this bar is a distinctively rich treat.”  Mmmmm, toffee and chocolate.

    I came across this recipe on Recipezaar.com and of course, it’s fabulous!  There are 4 ingredients total and it takes about 15 minutes of cook/put together time and that’s it!  I’ve made this twice now.  The first time I cut the recipe in half, which works nicely, and used semi-sweet chocolate chips.  It was good…but it didn’t quite taste like a Skor bar, so when I made it again, I used milk chocolate chips and it was AMAZING!  I took it into work and got nothing but raves about it.  If you’re looking for a quick treat or dessert, I really recommend this recipe.

    Enjoy!

     IMG_2072

    Ingredients.

    IMG_2073

    Toffee.

    IMG_2074

    Delicious!

    Mock Skor Bars, by Recipezaar
    Ingredients
    • 24 regular salted Saltine crackers
    • 1 cup butter
    • 1 cup brown sugar
    • 1 cup semi-sweet chocolate chips
    Directions
    1. Preheat oven to 350. Line a 13 x9 inch pan with Parchment (or foil) paper for easy clean up. Arrange crackers evenly in pan.
    2. In saucepan over medium heat melt butter. Stir in brown sugar until melted and smooth. Bring mixture to a boil stirring constantly until mixture is smooth and bubbly. Boil for 2 minutes and then pour mixture evenly over cracker.
    3. Bake in oven for 5 minutes.
    4. Sprinkle chocolate pieces evenly over caramel mixture. Return to oven just long enough for chocolate to melt. Spread chocolate evenly with spatula.
    5. Place pan in refrigerator or freezer until chocolate is firm. Cut or break into pieces.

    Sunday, February 28, 2010

    Cinnamon Apple Swirl Bread

    Here is another delicious recipe from Recipezaar.  I made this bread before years ago and came across it again a few weeks ago, while I was bored.  Mmmm, it’s good stuff. 

    It’s very similar to a cinnamon raisin bread, except you use apples!  Which is perfect for me because I’m not a fan of raisins but I happen to LOVE apples.  In making this, I made a few substitutions (surprise, surprise, right?).  First, I used half whole wheat flour because I usually use that in my baking and I prefer whole wheat bread.  Secondly, I didn’t have any “real” butter, so I used Smart Balance buttery spread and it worked great!  Third, I used Gala apples and mixed, chopped nuts.

    This bread takes a little while to make, due to the rising and such, but it’s worth it.  You get two loaves and they freeze very well.  One word of advice, next time I make this I plan to just roll it all up like a jelly roll from one end, as opposed to from both ends.  My reasoning would be that I like to eat this bread toasted with a bit of Smart Balance, but on some pieces the bread didn’t “connect together” and it broke in my toaster.  Which now leaves me with little pieces of apple and nuts and the bottom that get charred every time we make toast. :)

    Enjoy!

    IMG_2056

    Ingredients.

    IMG_2058

    Apple, cinnamon and nut filling.

    IMG_2057   

    Diesel likes to help me cook…even when I get a little messy.

     IMG_2060

    Pre-baked.

    IMG_2061

    Right out of the oven.

    IMG_2063

    Swirly!

    Cinnamon Swirled Apple Bread
    Ingredients
    • 5 1/2-6 cups all-purpose flour
    • 1 (1/4 ounce) package active dry yeast
    • 1 cup milk
    • 3 tablespoons granulated sugar
    • 3 tablespoons butter
    • 3/4 teaspoon salt
    • 2 eggs
    • 1 cup shredded apple
    • 1 1/2 cups finely chopped peeled apples
    • 1/2 cup finely chopped walnuts or pecans, toasted
    • 1/2 cup packed brown sugar
    • 2 teaspoons ground cinnamon
    • 2 tablespoons butter, softened
    • 1 slightly beaten egg white
    • 1 tablespoon water
    • coarse sugar
    Directions
    1. In a large mixing bowl combine 2 cups of the flour and the yeast; set aside.
    2. In a saucepan heat and stir milk, granulated sugar, the 3 tablespoons butter, and the salt until warm (120° to 130°) and until butter almost melts.
    3. Add milk mixture to dry mixture along with eggs.
    4. Beat with an electric mixer on low to medium speed for 30 seconds, scraping side of bowl constantly.
    5. Then beat on high speed 3 minutes.
    6. Stir in shredded apple.
    7. Using a wooden spoon, stir in as much remaining flour as you can.
    8. Turn dough out onto a lightly floured surface.
    9. Knead in enough of the remaining flour to make a moderately stiff dough that is smooth and elastic (6 to 8 minutes total).
    10. Shape into a ball. Place in lightly greased bowl, turning once to grease surface.
    11. Cover; let rise in a warm place until double (about 1 hour. Punch dough down.
    12. Turn dough out onto a lightly floured surface. Divide in half Cover; let rest 10 minutes.
    13. Lightly grease two 8x4x2- or 9x5x3-inch loaf pans.
    14. Meanwhile, for filling, in a medium mixing bowl combine chopped apple, nuts, brown sugar, and cinnamon; set aside.
    15. Roll half of the dough to a 14x9-inch rectangle. Spread with 1 tablespoon of the softened butter; sprinkle with half of the filling.
    16. Beginning at both short ends, roll each end up, jelly-roll style, to center.
    17. Place loaf, rolled side up, in a prepared loaf pan. For second loaf, repeat with remaining dough, remaining butter, and remaining filling.
    18. Cover, let rise until almost double in size (about 30 minutes).
    19. Stir together egg white and water. Brush egg white mixture over tops of loaves; sprinkle with coarse sugar.
    20. Bake in a 375° oven for 30 to 40 minutes or until bread sounds hollow when you tap tops (if necessary, loosely cover with foil for the last 15 minutes of baking to prevent overbrowning).
    21. Immediately remove from pans. Cool on wire racks.

    Sunday, February 7, 2010

    Brownies

    Jeremy loves brownies.  I’m not the biggest fan of them, but of course, I’d eat one if it were offered to me.  Unless, of course, there were also cookies.  If I had to pick between cookies and brownies, I’d take cookies in a heartbeat, but that’s not the point.  I was bored one afternoon and asked Jeremy if he would like some brownies.  Sure enough, he said yes, so off to baking I went.

    This recipe comes from Recipezaar.com and I’ve actually made these brownies a few time before.  People have always loved them!  They are easy to make, moist and very chocolatey.  Plus, you can add whatever”goodies” you like! (I added nuts and chocolate chips)  In all honesty though…I think they are a little too rich.  I know what you’re probably thinking, “Sara, how can a brownie be too rich?”  Call me crazy, but maybe it just comes down to the fact that brownies wouldn’t be my dessert of choice.  Dont’ get me wrong, they are still good…it’s just that I can’t eat more than a small piece before I'm all chocolated out.  So, if you’re looking for an easy and rich brownie, this is your recipe.

    Enjoy!

     IMG_2037

    Ingredients.

    IMG_2038

    Right out of the oven.

    IMG_2039

    Milk is necessary with this brownie.

    “Whatever Floats Your Boat” Brownies, by Recipezaar

    Ingredients

    • 1/2 cup butter, melted
    • 1/2 cup unsweetened cocoa
    • 1 cup sugar
    • 2 eggs
    • 2 teaspoons vanilla
    • 1/2 cup flour
    • 1/4 teaspoon salt

    WHATEVER FLOATS YOUR BOAT

    1-2 cup chocolate chips (semisweet, white, butterscotch, peanut butter) or raisins or chopped maraschino cherry or chopped nuts or M&M' or Reese's pieces or miniature marshmallow

    Directions

    1. Preheat oven to 350°F.
    2. Grease an 8 inch square pan or line with foil.
    3. In a medium bowl combine melted butter and cocoa and stir until cocoa is dissolved.
    4. Add sugar and mix well.
    5. Add eggs one at a time and stir until well combined.
    6. Stir in vanilla, flour and salt until you no longer see any flour (do not overmix).
    7. Fold in "WHATEVER FLOATS YOUR BOAT"!
    8. Spread in pan and bake for approximately 25 minutes.
    9. DO NOT OVER-BAKE -- your brownies will come out dry. Adjust time/temp accordingly for your oven. If you do the knife/toothpick test, it should come out with moist crumbs, not clean.
    10. Cool completely before cutting into squares.

    For double recipe, bake in 9x12 pan and add 5 minutes to baking time.  Makes 16 brownies.

    Sunday, October 25, 2009

    Pumpkin Butter

    This is a re-post from last year from my “other” blog, but it’s one of my favorite recipes, so I really felt that it need to be on this blog!  I’m still obsessed with this recipe and my new way of eating it is with chunky peanut butter on toast.  Oh yum!  The peanut butter and the pumpkin butter both melt a bit and  paired with the crunchy toast…oh man, it’s Heavenly. :)  Really…go make this right now.

    I've discovered a new recipe that I'm totally obsessed with...pumpkin butter!  I had some leftover canned pumpkin from when I made my Pumpkin Gingerbread, and this past weekend, I decided to do something about it. In my recipe search on Recipezaar, I came across this wonderful recipe for Warp-Speed Pumpkin Butter.  I had all the ingredients, so I thought, "Why not?"  Boy am I glad that I did because this stuff is absolutely amazing and I'm eating it any chance I get!

    The recipe is so easy and takes less than 10 minutes to cook in the microwave.  Oh my, the spices and the pumpkin are such a delicious combo!  Plus, while it was cooking, the whole house smelled like fall deliciousness!!  So far, I've had this pumpkin butter on toast and sliced apples, but the possibilities are endless.  If you like pumpkin, this recipe is a must-try!  Enjoy! :)

    IMG_0932

    Ingredients, except the pumpkin cause I was already measuring it.

    IMG_0931

    All mixed up and hot out of the microwave.

    IMG_0934

    Yummy!  Spread on apple slices.

     IMG_0937[2]

    Yum!  Spread on toast.

    Warp-Speed Pumpkin Butter, by Recipezaar

    Ingredients

    • 1/4 cup brown sugar, packed
    • 2 tablespoons granulated sugar
    • 1/4 cup water
    • 1/2 teaspoon allspice
    • 1/4 teaspoon ginger
    • 1/4 teaspoon clove
    • 1/4 teaspoon nutmeg
    • 1/2 teaspoon cinnamon
    • 1 1/2 cups canned pumpkin (NOT pumpkin pie filling mix)
    Directions
    1. Combine everything except the canned pumpkin in a microwaveable one quart bowl.  Mix well.
    2. Microwave on high for 3 minutes, then stir.
    3. Mix in the pumpkin well, and microwave on high 5 minutes longer.  It should be bubbly.
    4. Put into clean, sterilized jars for gift-giving, or into other clean, airtight containers for home use.
    5. Let cool slightly, then refrigerate.
    6. This will keep several weeks in refrigerator or can be frozen for longer storage.  This cannot be kept in your pantry- must be refrigerated or frozen.

    Monday, August 24, 2009

    Alice Springs Chicken

    The Alice Springs Chicken from Outback Steakhouse is one of Jeremy’s favorite meals there.  For those of you who have never had it, it’s a grilled chicken breast that is marinated in a honey mustard sauce, topped with mushrooms, bacon and cheese.  I’ll admit…it’s pretty delicious and probably has a million calories in it! 

    In selecting our meals for the week, Jeremy chose Alice Springs Chicken and I told him that he was in charge of finding me a recipe.  Apparently, I trained him well because he found a great recipe from the fabulous, Recipezaar.   This recipe is very, very close to the real thing!  The honey mustard sauce is one of the best I’ve had (and I’m not even a huge fan of honey mustard) and the cheesy bacon on top is amazing.  When I made this tonight, I cut the recipe in half, used light cheese, and left out the mushrooms, since Jerm isn’t a fan of them.  The chicken breasts that I used were huge, so we both only ate half…which means we have leftovers for tomorrow.  Yum!  So, here’s another highly recommended meal from our kitchen.

    Enjoy!

    IMG_1766

    Ingredients.

    IMG_1768

    Hot out of the oven.

    IMG_1769

    Served with veggies and au gratin potatoes.  Yum!

    Now This is Alice Springs Chicken, by Recipezaar
    Ingredients
    • 1 cup Dijon mustard
    • 1 cup honey
    • 1 tablespoon canola oil
    • 1 teaspoon lemon juice
    • 4-6 boneless skinless chicken breasts
    • 1 tablespoon vegetable oil
    • 2 cups sliced mushrooms
    • 2 tablespoons butter
    • 1/2 teaspoon salt
    • 1/2 teaspoon pepper
    • 1/2 teaspoon paprika
    • 12 slices bacon, cooked
    • 3 cups shredded Mexican blend cheese
    • 2 teaspoons chopped fresh parsley
    Directions
    1. With an electric mixer combine the mustard, honey, and 1 Tbsp oil, and lemon juice for 1 minute.
    2. Pour 1/2 mixture over chicken in a gallon ziplock to marinate in fridge 2-24 hours.
    3. Chill remaining marinade to serve with chicken.
    4. After marinating chicken, preheat oven to 375°F Put remaining oil in frying pan. Heat and sear chicken on both sides.
    5. Transfer chicken to oven safe pan and brush with marinade.
    6. Meanwhile in frying pan add butter and sauté mushrooms.
    7. Season chicken breasts with salt and peppers.
    8. Stack bacon across each breast, spoon mushrooms on each breast and then approx 1/3- 1/2 cup cheese on each.
    9. Cover pan with foil and bake 7-10 minutes or until cheese is melted and bubbly. Sprinkle with parsley and serve with honey mustard marinade.

    Sunday, July 12, 2009

    Classic Baked Ziti

    This a a pretty basic recipe but it's always a delicious one!  Usually when I'm making baked pasta, I just kinda throw together what I think sounds good (spaghetti type ingredients), add some cheese on top and throw it in the oven.  Well, last week Jeremy specifically requested "Baked Ziti," so that set me on a search for the recipe. 

    I used a recipe from my old standby, Recipezaar.  Whenever I search for a recipe on that website I always sort by "Rating," and this one was high up on the list.  It's simple, it's cheesy, it's Baked Ziti! :)  I cut the recipe in half since it was just for Jerm and me, and it turned out nicely.  Add some breadsticks and salad and you've got a delicious meal.  Definitely try it out if you're looking for easy and classic dinner. 

    Enjoy!

    IMG_1689 

    Ingredients.

    IMG_1690

    Pre-baked.

    IMG_1692

    Post baked.

    Classic Baked Ziti, by Recipezaar

    Ingredients

    • 1 lb lean ground beef
    • 1 cup onion, chopped
    • 2 cloves garlic, minced
    • 1 (32 ounce) jar meatless sauce
    • 1 cup chicken broth
    • 1 teaspoon dried oregano leaves
    • 1 (16 ounce) package ziti pasta, cooked and drained
    • 2 (8 ounce) cups shredded mozzarella cheese
    • 1 cup grated parmesan cheese
    Directions
    1. Preheat oven to 350 degrees F.
    2. In a large skillet, cook ground beef, onions, and garlic over medium-high heat for 6 to 8 minutes or until beef is browned; stirring frequently.
    3. Stir in spaghetti sauce, chicken broth, and oregano.
    4. Reduce heat and simmer for 10 minutes.
    5. Stir 1 cup of the sauce into the cooked ziti noodles.
    6. Spoon 1/2 of the ziti mixture into a 13x9x2-inch baking dish.
    7. Sprinkle with 1 1/2 cups mozzarella cheese and 1/2 cup Parmesan cheese.
    8. Top with 2 cups sauce, then remaining ziti mixture and remaining sauce.
    9. Cover and bake 20 minutes.
    10. Sprinkle with remaining mozzarella and Parmesan cheese.
    11. Return to oven and bake uncovered for 10 minutes or until heated through.

    On a quick side note, I' like to thank finsmom for giving me this lovely award!  I've never gotten a blog award before.  "You like me...you really like me!"  Who knew that people other than my mom, my husband, and my in-laws read my blog! :)  Thank you!!

    These are the rules of this award:

    1. Accept the award, post it on your blog together with the name of the person who has granted the award, and his or her blog link.
    2. Pass the award to 15 other blogs that you’ve newly discovered.
    3. Remember to contact the bloggers to let them know they have been chosen for this award.
    I think 15 is A LOT, so I'm not going to have quite that many...7 is a good number...how about 7?  Therefore, I would like to pass this award on to the following great blogs:

    Stacy Runs

    Baked Perfection

    My Baking Addiction

    Iowa Girl Eats

    My Kitchen Cafe

    Loves to Eat

    Latest Addictions