Showing posts with label chocolate. Show all posts

Tuesday, April 19, 2011

Cake Balls

If you've been around the food/cooking/baking blog community, I'm sure that you're familiar with Bakerella.  Her beautiful treats are works of art and her Cake Pops are especially lovely.  If you're not familiar, go ahead and check out her website, I'll wait...
 
Pretty cute, right?  Did you see the reindeer ones for Christmas?  So, cute!  Why can’t I have that talent?
 
Anyway, I've wanted to make Cake Pops for awhile and finally got around to doing it a few weeks ago.  However, I didn't have any sticks, so mine were Cake Balls.  I followed Bakerella's directions located here and my Cake Balls were a success!  Not only were they easy to make, but boy, were they good.  They reminded me of kind of a Ho-Ho, with their firm coating and soft inside.  One thing to remember though is to make sure your chocolate coating stays warm and melty…otherwise, it will start to thicken up and you’ll have lumpy balls.  Ha!
 
IMG_2768
Smooth, pretty balls.
 
IMG_2769
Bumpy, ugly balls.
 
IMG_2771
Mmmm, Cake Balls!
 
On a side note, when I was making these Cake Balls I could not stop thinking of the Saturday Night Live skit called, "Schweddy Balls."  In fact, I giggled for a good hour while making them (I have a high level of maturity).  You've seen the skit, right?  It's good old Saturday Night Live humor and though slightly inappropriate...it's hilarious!  And just incase you haven't, here it is. 
 
Enjoy the video clip and enjoy these Schweddy Balls...I mean, Cake Balls!
 

Cake Balls by Bakerella

Ingredients

  • 1 box cake mix (cook as directed on box for 13 X 9 cake) – I used Devil’s Food
  • 1 can frosting (16 oz.) – I used Vanilla
  • 1 package chocolate bark (regular or white chocolate)
  • wax paper

Directions

  1. After cake is cooked and cooled completely, crumble into large bowl.
  2. Mix thoroughly with 1 can cream cheese frosting.
  3. Roll mixture into quarter size balls and lay on cookie sheet.
  4. Chill for several hours.
  5. Melt chocolate in microwave per directions on package.
  6. Roll balls in chocolate and lay on wax paper until firm.

**See Bakerella’s website for detailed instructions and prettier balls! **

Thursday, April 7, 2011

Decadent Peanut Butter Pie

Well, well, well...look who it is!  It's me!  I'm back from my blogging hiatus!  Isn't that exciting?  Since the end of February, I've been traveling a lot for work, but over the past week I have been home and making some good recipes.  To make up for my absence, I'm starting off with a recipe that will knock your socks off, so here we go...

First of all, I love peanut butter.  It is my favorite food.  I've asked (and received) peanut butter for Christmas.  I think it's delicious.  I have a jar in my desk at work.  And I've been know to eat spoonfuls straight out of the jar.  It completes me.  When I first saw this recipe, I knew that I was destined to make it. 
IMG_2781
Man 'o man, this pie did not disappoint us.  It is rich in it's peanut butter and chocolate flavor, but also light at the same time.  With a filling made of cream cheese and cool whip, it doesn't leave you feeling weighed down...just thoroughly peanut butter satisfied.  Usually I would use light cream cheese, but I didn’t want to risk changing the texture of the pie, so I used regular.  However, I did use “light” Cool Whip because as you all know, if you use at least one “light” item in your baking, it cancels out the calories of everything else.  No joke.  It’s a true story.  Also, as you'll see from the pictures, I added chopped up Reese's Peanut Butter cups to the top of the pie because really...why not?  If you’re a peanut butter nut like me, go make this pie and then enjoy every single bite of it.  That’s what I’m going to go do now! 
Enjoy!
IMG_2780
Ingredients.
IMG_2783
Ummm…YUM!

Ingredients
  • 1 cup Jif Creamy Peanut Butter, plus 2 tablespoons, divided
  • 1 (8 oz.) package cream cheese, softened
  • 1/2 cup sugar
  • 1 (12 oz.) container (4 1/2 cups) frozen whipped topping, thawed and divided
  • 1 prepared chocolate pie crust
  • 1 (11.75 oz.) jar Smucker's Hot Fudge Ice Cream Topping, divided
Directions
  1. BEAT together 1 cup peanut butter, cream cheese and sugar in large bowl with an electric mixer on medium, until well combined. Gently mix in 3 cups whipped topping until thoroughly combined. Spoon mixture into pie shell. Using a spatula, smooth mixture to edges of pie.
  2. RESERVE 2 tablespoons of hot fudge topping into the corner of a resealable food storage bag; set aside. Microwave remaining topping on HIGH (100% power) for 1 minute. Stir. Spread topping over pie, covering entire peanut butter layer. Refrigerate until set. Spread remaining whipped topping (1 1/2 cups), over hot fudge layer, being careful not to mix the two layers.
  3. CUT a small corner from bag containing topping. Squeeze bag to drizzle topping over pie. Place remaining 2 tablespoons peanut butter in a resealable food storage bag; cut bag corner and squeeze to drizzle in opposite direction from topping. Refrigerate until ready to serve.

Monday, January 17, 2011

The Best Chocolate Cake in the Whole World!

Ladies and gentlemen, do I have a recipe to share with you!  I've been holding onto this recipe for years...just waiting for the right time to make it.  Last week, we were having friends over for dinner and I needed a dessert to make.  While looking through the cabinets, I stumbled upon my Bundt pan and I knew, it was time to make this cake.  Holy moley, I don't know why I waited so long to make it, but boy, am I glad that I did!!
 
This cake is the most chocolaty cake I've ever had in my life.  And I am absolutely, 100% in love with it.  Not only is it chocolate cake, but it's got chocolate pudding mix and chocolate chips inside, and it's covered with chocolate glaze.  Oh yea!  What's not to love about that?  This cake is wonderful at room temperature, but for more decadence, put it in the microwave for 30 seconds.  Oh.  My.  Gosh.  It's Heaven, I tell you.  Pure Heaven.  Even Jeremy, who isn't a fan of cake, said, "This is amazzzing!"  Plus, when I told him that I was going to make us one every week, he gladly said, "Sounds good to me!"  Make this cake now.  You will not regret it (though your hips just might!).
 
Enjoy!

IMG_2744
Pre-glazed.
 
IMG_2746
Post-glazed.
 
IMG_2747

Ingredients

  • 1 (18 1/4 ounce) package devil's food cake mix
  • 1 (4 ounce) package instant chocolate pudding mix
  • 2 cups semi-sweet chocolate chips
  • 1 3/4 cups water
  • 2 eggs, beaten
  • 1 teaspoon vanilla extract

Chocolate Glaze

  • 3 tablespoons cocoa
  • 2 tablespoons butter, melted
  • 1 cup powdered sugar
  • 2 -3 tablespoons hot water
Directions
  1. Preheat oven to 350°, grease and flour bundt pan, set aside.
  2. In large mixing bowl, combine cake mix, pudding mix and chocolate chips.
  3. In another bowl, combine water, eggs, and vanilla mixing well.
  4. Add egg mixture to dry mixture and mix with spoon until just blended.
  5. Pour into prepared pan. Bake for 50 to 55 minutes or until cake tests done when wooden pick in center comes out clean.
  6. Cool 15 to 20 minutes before removing cake from pan.
  7. For Chocolate Glaze: Combine all ingredients in bowl and mix with spoon until smooth.
  8. When completely cool, drizzle cake with Chocolate Glaze.

Tuesday, January 4, 2011

I'm Baaaack! With Rocky Road Candy

Hello friends!  Since it's been awhile since my last post, I hope you all had a Happy Thanksgiving, Merry Christmas and Happy New Year!  I apologize for disappearing for a few months, but it just needed a break from blogging about my cooking.  I still cooked and I still took pictures, but for some reason, they just didn't magically blog themselves.  Bummer, right?  Anyway, I'm back with recipes to share, so let's get to it!
 
When I was a kid, my mom would make Rocky Road Candy every Christmas, as gifts for people, and they would rave about!  Now that I'm a "grown up," I make it for friends during the holidays too and it is something that I look forward to it all year long.  Not only is it chocolaty and delicious, but it is ridiculously easy!  No joke, there are only 4 ingredients and it takes less than 8 minutes to make.  Besides all that, what I love the most about this is the butterscotch chips!  You don't suspect them to be in there, but then you bite into the candy and get that yummy butterscotch flavor in the background.  Mmmm!  I highly recommend that you make this candy, whether it's Christmas time or not.
 
Enjoy!

IMG_2708

Ingredients.

IMG_2709

Pre-microwave.

IMG_2710

Post-microwave.

IMG_2715

All cut up and ready to be eaten!


Rocky Road Candy by Mom

Ingredients

  • 1 bag of chocolate chips
  • 1 bag of butterscotch chips
  • 1 cup of chunky peanut butter
  • 2 cups of marshmallows
  • Anything else that will make your candy "rockier": raisins, nuts, craisins, etc.
  1. Put chocolate chips, butterscotch chips and peanut butter in a microwavable bowl.  Melt on high for about 3 minutes, until smooth.
  2. Stir in marshmallows.
  3. Pour into a greased 11 x 8 pan and refrigerate for a few hours or even overnight, until hard.
  4. Cut into 1 inch squares and store in the refrigerator until ready to give away or eat. 

Thursday, July 1, 2010

Ice Cream Pie

Yum, yum, yum!  This is the new favorite dessert in our house.  I’ve made it twice in the last 3 weeks.  I came across the idea for this dessert on the Eat Better America website and thought that it’d be perfect for summer! 

I made it for the first time when my family came up to visit and it was so good, that Jeremy requested it again for when Jayla came over last week.  Speaking of Jeremy, I have a cute story about this recipe.  When I first told him that I was going to make an ice cream pie for dessert, Jeremy gave me a confused look and said, “But won’t the ice cream melt in the oven?”  Ah ha ha, cute, huh?  I explained that I wouldn’t actually be baking it  and he still seemed skeptical, but I think I convinced him that it’s good.

So, my inspiration for this ice cream pie was from this Healthified Turtle Ice Cream Cake.  I actually had all the intentions of following that recipe, but then I thought, “Well, there is premade Oreo crust at the store, so why should I make my own?”  Then, I asked Jeremy if he wanted a different kind of ice cream than vanilla and he wanted strawberry.  Personally, I was thinking Cookies ‘n Cream or Coffee would be excellent, but he’s not a fan of those.  Really, this recipe is more of a method.  Use whatever kind of ice cream you like.  Use a graham cracker crust instead of Oreo.  Add as much hot fudge as you want.  Or substitute butterscotch topping.  Use peanuts instead of pecans.  Or whatever.  You get the idea.

Enjoy!

 IMG_2282

Ingredients.

IMG_2286

Eat me!

Sara’s Ice Cream Pie

  • 1 store bought Oreo cookie pie crust
  • 2 - 3 cups reduced fat chocolate ice cream, slightly softened
  • 2- 3 cups reduced fat strawberry ice cream, slightly softened
  • 1/2 cup Sugar free hot fudge topping
  • 1/2 cup chopped pecans
  • Sugar-free caramel topping
  1. Drop chocolate ice cream by small spoonfuls over crust; carefully spread until smooth. Freeze 1 hour or until firm.
  2. Spoon and carefully spread fudge topping over ice cream. Sprinkle with pecans; press lightly. Freeze 1 hour or until firm.
  3. Drop strawberry ice cream by small spoonfuls over pecan layer; carefully spread until smooth. Cover; freeze at least 8 hours or overnight.
  4. To serve, let stand at room temperature 5 to 10 minutes to soften. Cut into 8- 12 wedges. Place each wedge on individual dessert plate; drizzle each with caramel topping and additional nuts, if desired.

Monday, June 14, 2010

M&M Dream Bars

Hello friends, have you ever thought you blogged a post, only to find out 3 days later that it never went through?  That's what happened to me.  I thought I posted this on Friday, but just realized that it never went through due to a server error!  And here I was thinking that just no one was reading my blog. :)  Well, here is another tasty, sweet treat for you! We had a graduation BBQ at my work last month for those students, that work in our office, who graduated. As usual, I signed up to bring a dessert (does that surprise anyone?).

I’ve made this recipe a couple of times before, as it’s any easy go-to-dessert, plus it’s delicious. The first time I made these bars, I took them to my friend Alli’s parent’s Christmas party (easily jazzed up with red and green M&Ms)…and I’m proud to say that her mom requested the recipe and they are now a yearly additional to the dessert table! :)

These bars are sweet, chocolaty, nutty and are like a big oatmeal cookie! There is a layer of sweet gooiness in the middle that really amps up the recipe from other bars. I love them! They are fabulous…and of course, they were all eaten up by my co-workers!

Enjoy!
Ingredients.
Bottom “crust” layer.
Gooey deliciousness.
Right out of the oven.
Mmmm.
  

Ingredients

  • 2 cups oatmeal

  • 1 cup firmly packed brown sugar

  • 1 1/2 cups all-purpose flour

  • 1/2 cup coconut

  • 1 teaspoon baking soda

  • 1/2 teaspoon salt

  • 1 cup melted butter

  • 1 (14 ounce) can sweetened condensed milk

  • 1/2 cup peanut butter

  • 1 cup M&M' 

  • 1 cup chocolate chips  
Directions
  1. Combine oatmeal, brown sugar, flour, coconut, baking soda, and salt; add melted butter and stir until moist (the mixture will be crumbly). Reserve 1 1/2 cups and press remaining crumbs into a greased 13X9-inch baking pan (I line the pan with non-stick foil.). 
  2. Bake 12 minutes at 375°F. 
  3. Combine milk and peanut butter; carefully spread over baked crust. Sprinkle on M&M's and chocolate chips. Sprinkle reserved crumbs over chocolate pieces and lightly press crumbs down. 
  4. Bake 20 minutes, or until golden brown. Cool completely before cutting. 

Tuesday, May 4, 2010

Peanut Butter and Chocolate Chip Cookies

I’ve said it before, but I’ll say it again…I love cookies.  I especially love these cookies because they contain my most favorite food: peanut butter.  But not only do they contain peanut butter, they also have Reese’s Pieces in them AND chocolate chips!  I know, right?  AMAZING!

I bought a good sized bag of Reese’s Pieces to snack on, but after having them in the house for about a week, I realized how dangerous they were and I needed to devise a plan to get rid of them (without throwing them away, of course).  Cookies immediately came to mind.  Phew!  Crisis averted.

So, where did this recipe come from??  Whenever I find a new recipe on a blog or website, I usually print it out and throw it on my computer desk in our office.  As you can imagine, with all the wonderful blogs that I read, I have quite a stack of delicious recipes, especially cookie recipes, sitting there, just waiting for me to make them.  However, this recipe came from…the back of my peanut butter jar!  I look at that jar almost everyday, so no wonder the recipe was in my head! :)

In my usual baking-fashion, I made a few adjustments to the recipe.  First of all, I used butter instead of shortening because 1) shortening kinda creeps me out and 2) butter makes a softer cookie.  While gathering ingredients out of the pantry, I came across half a bag of chocolate chips and thought, “Hey, why not!”  Then, of course, I added the Reese’s pieces.  Also, as a side note, in between batches I’d put the dough in the fridge, so the texture/butter consistency would not change.

I’m not gonna lie…these cookies are good.  They are soft, peanut buttery and chocolaty.  Could it get any better?  I took them to work the next day and one of my co-workers (who’s eaten a lot of my cookies) said, “Oh my gosh, these are the best cookies you’ve made in my entire life!”  Ha!  So, there’s the proof.  They are good.

Enjoy!

 IMG_2141

Ingredients.

IMG_2146

Cooling.

IMG_2148

Up close and personal.

Irresistible Jif Peanut Butter Cookies

Ingredients

  • 3/4 cup Jif Creamy Peanut Butter
  • 1/2 cup Crisco® All-Vegetable Shortening (1/2 cup butter)
  • 1 1/4 cups firmly packed light brown sugar
  • 3 Tablespoons milk
  • 1 Tablespoon vanilla
  • 1 egg
  • 1 3/4 cups all-purpose flour
  • 3/4 teaspoon salt
  • 3/4 teaspoon baking soda
  • 1 cup chocolate chips
  • 1 cup Reese’s Pieces

Directions

  1. Preheat oven to 375ºF.
  2. Place sheets of foil on countertop for cooling cookies.
  3. Combine Jif peanut butter, Crisco® Shortening (butter), light brown sugar, milk and vanilla in large bowl.
  4. Beat at medium speed of electric mixer until well blended.
  5. Add egg. Beat just until blended.
  6. Combine flour, salt and baking soda.
  7. Add to creamed mixture at low speed. Mix just until blended.
  8. Drop by heaping teaspoonfuls 2 inches apart onto ungreased baking sheet.
  9. Flatten slightly in crisscross pattern with tines of fork. (skip if using chip and pieces)
  10. Bake at 375ºF for 7 to 8 minutes or until set and just beginning to brown.  Makes 3 dozen cookies.

Thursday, March 18, 2010

POM Wonderful Chocolate Cupcakes

A few weeks ago, the fabulous people at POM Wonderful sent me a free sample of their pomegranate juice!  Yay!  Have you guys ever tried this stuff?  It’s delicious and the health benefits from it are amazing.  

IMG_2071

Here are a few outcomes of numerous studies done by POM Wonderful where patients drank 8oz of POM Wonderful Pomegranate Juice daily:

Cardiovascular

  • In 13 healthy male volunteers who drank POM Wonderful 100% Pomegranate Juice for 2 weeks, the amount of LDL cholesterol oxidation decreased by 20% and antioxidant activity in the blood increased by 9%. Read the study.
Prostate Cancer
  • • In a clinical study involving 46 men with rising PSA after prostate cancer treatment (surgery or radiation) who consumed 8 ounces of POM Wonderful 100% Pomegranate Juice daily over two years, PSA doubling time increased from 15 to 54 months (p <0.001).5 A longer term (6-year) continued evaluation of active sub-group patients showed a further increase in PSA doubling time to 88 months. Read the study.
    * PSA doubling time is an indicator of prostate cancer progression.

Pretty awesome, right?  Major health benefits from such a little bottle.  Anyways, beside just drinking this juice, I wanted to make something with it.  After searching the POM website, I found a chocolate cupcake recipe!  Chocolate cupcakes made with pomegranate juice??  I was intrigued and decided to make it.  The chocolate cupcakes were delicious and had just a hint of pomegranate flavor in them…and of course, they were 100% healthy because of this juice and had zero calories in them (I can’t dream can’t I?). 

Along with the cupcakes, I also found a recipe for cream cheese frosting on the POM website, but I had some issues with it.  It calls for 1 1/2 cups of juice.  That seems like an awful lot for frosting, doesn’t it?  I’ve made many frostings in my day, but never one with so much liquid.  In fact, I only added 1/4 cup of juice because it made the frosting so runny.  There was no way that my frosting was going to turn out like this picture.

 POM Velvet Cupcakes with POM Cream Cheese Frosting

Has anyone else tried to make this recipe before?  What did I do wrong?  Anyway, it turned out to be more of an icing, so I just dunked the cupcakes in them and viola!  Deliciousness.  Thank you POM Wonderful for sending me some juice.  I already feel healthier! :)

Enjoy!

IMG_2077 

Cupcake ingredients.

IMG_2079

Iced cupcakes.

IMG_2078

Frosting ingredients.

IMG_2080

Mmmmm.

POM Wonderful Chocolate Cupcakes
Ingredients
  • 1 cup POM Wonderful 100% Pomegranate Juice
  • 3 cups all-purpose flour
  • 2 cups granulated sugar
  • 1/2 cup unsweetened cocoa powder
  • 2 teaspoons baking soda
  • 1 teaspoon salt
  • 1 cup water, heated to boiling
  • 3/4 cup vegetable oil
  • 2 tablespoons vinegar (not wine vinegar)
  • 1 tablespoon vanilla

Directions

  1. Preheat oven to 350F with rack in the center, place a paper baking cup in each of 24 regular sized muffin cups.
  2. Whisk together the dry ingredients to combine well, in a large measuring cup.
  3. Combine pomegranate juice and boiling water.  Add oil, vinegar and vanilla to the pomegranate juice mixture.
  4. Add to the flour mixture all at once and whisk to combine (batter will be lumpy).
  5. Divide the batter evenly among the muffin cups (about half full), bake 25 minutes or until toothpick inserted in the middle comes out clean and free of crumbs, let cool.

POM Cream Cheese Frosting

Ingredients

  • 1-1/2 cups POM Wonderful 100% Pomegranate Juice
  • 4 oz. soft unsalted butter
  • 8 oz. cream cheese, at room temperature
  • 14 oz. powdered sugar

Directions

  1. Place butter into electric mixer bowl with paddle attachment and cream on medium-high speed for 1 minute, add the cream cheese and continue to mix for 2 more minutes,
  2. Turn the speed down to low and slowly add in the powdered sugar and the pomegranate juice, mix until the sugar is fully combined.
  3. Remove icing from the mixer and place into a piping bag with a round or star tip.
  4. OR just dunk your cupcake into the runny icing! :)

Friday, March 12, 2010

Chocolate Toffee Candy

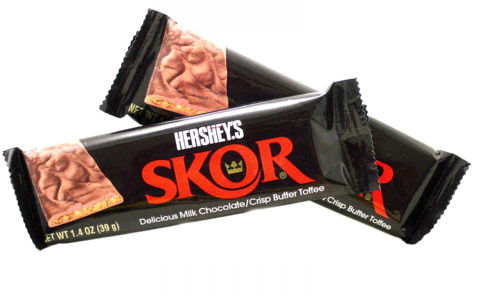
Hello blog readers!  I hope you are all doing well.  Today I present you with one of the easiest and most delicious recipes ever!  Have you ever had a Skor candy bar?  Well, if you haven’t, I highly encourage you to go to the store and buy one right now because they are delicious.  According to the Hershey website, “with buttery toffee enrobed in milk chocolate, this bar is a distinctively rich treat.”  Mmmmm, toffee and chocolate.

I came across this recipe on Recipezaar.com and of course, it’s fabulous!  There are 4 ingredients total and it takes about 15 minutes of cook/put together time and that’s it!  I’ve made this twice now.  The first time I cut the recipe in half, which works nicely, and used semi-sweet chocolate chips.  It was good…but it didn’t quite taste like a Skor bar, so when I made it again, I used milk chocolate chips and it was AMAZING!  I took it into work and got nothing but raves about it.  If you’re looking for a quick treat or dessert, I really recommend this recipe.

Enjoy!

 IMG_2072

Ingredients.

IMG_2073

Toffee.

IMG_2074

Delicious!

Mock Skor Bars, by Recipezaar
Ingredients
  • 24 regular salted Saltine crackers
  • 1 cup butter
  • 1 cup brown sugar
  • 1 cup semi-sweet chocolate chips
Directions
  1. Preheat oven to 350. Line a 13 x9 inch pan with Parchment (or foil) paper for easy clean up. Arrange crackers evenly in pan.
  2. In saucepan over medium heat melt butter. Stir in brown sugar until melted and smooth. Bring mixture to a boil stirring constantly until mixture is smooth and bubbly. Boil for 2 minutes and then pour mixture evenly over cracker.
  3. Bake in oven for 5 minutes.
  4. Sprinkle chocolate pieces evenly over caramel mixture. Return to oven just long enough for chocolate to melt. Spread chocolate evenly with spatula.
  5. Place pan in refrigerator or freezer until chocolate is firm. Cut or break into pieces.

Thursday, February 18, 2010

A Review, a GIVEAWAY & Derby Pie

Boy, this is going to be one packed post!  Bare with me though because it’s good.  I promise.

  First, we have a review!  A few weeks ago, I was contacted by Skin MD Natural asking me if I’d be interested in receiving one of their products and reviewing it.  Heck yea, I would!  I’m so glad that I was able to receive a sample of their Shielding Lotion because this stuff is awesome!


Living in AZ for the majority of my life, I’ve always had skin that was more on the dry side.  Ever heard people in AZ say, “Oh, it’s a dry heat?”  Well, they weren’t kidding!  Add winter on top of that and then the fact that I’m always washing my hands…it all leaves me with dry skin.  The first time I used the shielding lotion, my skin was instantly moisturized and soft, and I was surprised that it stayed that way through most of the day!  Plus, the lotion is very light, non-greasy, fragrance free and a little goes a long way.  I love that!  I’ve been using the Shielding Lotion for about a week now and the overall appearance of my skin has improved greatly.  No more rough hands or dry cuticles, just soft, smooth skin.  It’s wonderful!   Check out these cool facts about Skin MD’s Shielding Lotion:

  • It’s natural, eco-friendly
  • It’s unlike any other conventional, artificial moisturizers because it works with the skin to naturally moisturize and heal
  • It helps restore skin's natural protective abilities by bonding to the outer layer of skin, strengthening skins natural barrier against toxins and irritants that can dry the skin, while locking in the
    skin's natural oils
  • It’s made in the US, using high quality natural ingredients, making it over 90% all natural
  • It’s free of harmful fragrances, parabens, and colorants making it hypoallergenic
  • It’s also vegan-friendly and gluten-free

Pretty cool stuff, right?  I highly recommend this lotion to those with dry skin…in fact, let me help you with that: secondly, we have a GIVEAWAY!  I’ll be randomly selecting one lucky reader to win a full size bottle of the Skin Natural MD Shielding Lotion on Tuesday, February 23rd at 12pm AZ time and here’s how you enter:

  1. Leave a comment telling me why your skin is so dry.
  2. Tweet the following: “@saraboff from Sara’s Sweets is having a Skin Natural MD giveaway and I want to win! http://bit.ly/afPaAA,” then, leave a comment telling me you’ve done so.
  3. Blog: If you have a blog of your own, mention my giveaway in a post, then leave a comment telling me you’ve done so.

That’s it!  Good luck!

Lastly, we have a recipe.  A very delicious recipe, I might add.  One of the blogs that I frequent is Iowa Girl Eats.  Kristin has some delicious recipes, plus great tips on exercise and being healthy.  A few months ago, she posted this recipe and I knew that I had to make it! 

Kentucky Derby Pie is basically a chocolate chip cookie pie.  I know, right!  A chocolate chip cookie pie?! = AMAZING!  I followed the recipe to a “t” and it rocked my world.  Stop reading right now, go to the store, buy the ingredients and make this asap!  It is THAT good.

 IMG_2052

Ingredients.

IMG_2054

Done baking.

IMG_2055

You have to eat it while it’s still warm!  Oh my goodness!

Kentucky Derby Pie, by Iowa Girl Eats

Ingredients

  • 1 stick butter, softened
  • 1 cup sugar
  • 2 eggs
  • 1 teaspoon vanilla
  • 1/2 cup flour
  • 1 cup chopped pecans
  • 6 oz. semi-sweet chocolate chips
  • dash of salt
  • 1 frozen deep dish pie crust

Directions

  1. Pre-heat oven to 325 degrees. Cream butter and sugar until light and fluffy. Add eggs, one at a time and mix well after each egg. Add vanilla and mix.
  2. Combine remaining ingredients into mixture and spoon into pie shell. Bake for 55-60 minutes, or until golden brown on top. Serve warm!

Sunday, February 7, 2010

Brownies

Jeremy loves brownies.  I’m not the biggest fan of them, but of course, I’d eat one if it were offered to me.  Unless, of course, there were also cookies.  If I had to pick between cookies and brownies, I’d take cookies in a heartbeat, but that’s not the point.  I was bored one afternoon and asked Jeremy if he would like some brownies.  Sure enough, he said yes, so off to baking I went.

This recipe comes from Recipezaar.com and I’ve actually made these brownies a few time before.  People have always loved them!  They are easy to make, moist and very chocolatey.  Plus, you can add whatever”goodies” you like! (I added nuts and chocolate chips)  In all honesty though…I think they are a little too rich.  I know what you’re probably thinking, “Sara, how can a brownie be too rich?”  Call me crazy, but maybe it just comes down to the fact that brownies wouldn’t be my dessert of choice.  Dont’ get me wrong, they are still good…it’s just that I can’t eat more than a small piece before I'm all chocolated out.  So, if you’re looking for an easy and rich brownie, this is your recipe.

Enjoy!

 IMG_2037

Ingredients.

IMG_2038

Right out of the oven.

IMG_2039

Milk is necessary with this brownie.

“Whatever Floats Your Boat” Brownies, by Recipezaar

Ingredients

  • 1/2 cup butter, melted
  • 1/2 cup unsweetened cocoa
  • 1 cup sugar
  • 2 eggs
  • 2 teaspoons vanilla
  • 1/2 cup flour
  • 1/4 teaspoon salt

WHATEVER FLOATS YOUR BOAT

1-2 cup chocolate chips (semisweet, white, butterscotch, peanut butter) or raisins or chopped maraschino cherry or chopped nuts or M&M' or Reese's pieces or miniature marshmallow

Directions

  1. Preheat oven to 350°F.
  2. Grease an 8 inch square pan or line with foil.
  3. In a medium bowl combine melted butter and cocoa and stir until cocoa is dissolved.
  4. Add sugar and mix well.
  5. Add eggs one at a time and stir until well combined.
  6. Stir in vanilla, flour and salt until you no longer see any flour (do not overmix).
  7. Fold in "WHATEVER FLOATS YOUR BOAT"!
  8. Spread in pan and bake for approximately 25 minutes.
  9. DO NOT OVER-BAKE -- your brownies will come out dry. Adjust time/temp accordingly for your oven. If you do the knife/toothpick test, it should come out with moist crumbs, not clean.
  10. Cool completely before cutting into squares.

For double recipe, bake in 9x12 pan and add 5 minutes to baking time.  Makes 16 brownies.

Monday, August 3, 2009

Ginger Snaps and Chocolate Crackles

Whoa, look out!  I’ve got two cookies in one post.  Brace yourself for delicious sweetness.

About a month ago, I signed up for the “Cookie Bag Ministry” at church.  The ministry consists of members delivering cookies and information to first time guests of the church.  Well last week, I got my first phone call and assignment, and I was SO excited.  They told me that I could either bake cookies or buy cookies from the store.  Me?  Buy cookies from the store?  Perish the thought!!  Obviously, I opted to bake them myself.  And so my quest for new recipes began… 

I came across this first recipe about a week ago, on one of the blogs I read.  Therefore, I won’t re-post the recipe, I’ll just provide the link to it and share my review. 

Ginger Snap Cookies by  The Sister's Cafe

These cookies are AWESOME!  I love gingerbread cookies and ginger snaps; however, they do have a tendency to be a crispy cookie, as opposed to a soft and chewy one.  Well, not these!  These are soft, chewy and quite flavorful.  I definitely added in the “optional” white chocolate chips and I’m so glad I did because they compliment the ginger flavor beautifully.  These will without a doubt become one of my most loved cookies.  By the way, I used whole wheat flour and cut the recipe in half.

IMG_1730

Ingredients.

IMG_1734

Mmmmm.

IMG_1732

My usual, “quality control.”

The next cookie, Chocolate Crackles, comes from my Martha Stewart’s Cookies cookbook.  I’ve never made these kind of cookies before and they looked pretty in the cookbook, so I thought, “What the heck?”  Theses cookies are very tasty and very chocolatey!  I’d recommend rolling them in A LOT of powered sugar to get the full “crackle” effect, otherwise some of it will absorb.  Also, the recipe says to chill the dough for a few hours…well, I wasn’t that patient, so I just put it in the freezer for 30 minutes and voila!  As with the Ginger Snaps, I used whole wheat flour and cut the recipe in half.

Enjoy!

IMG_1733

Ingredients.

IMG_1741

Crackly.

Chocolate Crackle Cookies by Martha Stewart

  • 8 ounces bittersweet chocolate, melted and cooled
  • 1 1/4 cups all-purpose flour
  • 1/2 cup Dutch cocoa powder
  • 2 teaspoons baking powder
  • 1/4 teaspoon salt
  • 8 tablespoons (1 stick) unsalted butter, room temperature
  • 1 1/3 cups light-brown sugar, firmly packed
  • 2 large eggs
  • 1 teaspoon pure vanilla extract
  • 1/3 cup milk
  • 1 cup confectioners' sugar, plus more for rolling

Directions

  1. Heat oven to 350 degrees. Chop bittersweet chocolate into small bits, and melt over medium heat in a heat-proof bowl or the top of a double boiler set over a pan of simmering water. Set aside to cool. Sift together flour, cocoa, baking powder, and salt.
  2. In the bowl of a heavy-duty electric mixer fitted with the paddle attachment, beat butter and light-brown sugar until light and fluffy. Add eggs and vanilla, and beat until well combined. Add melted chocolate. With mixer on low speed, alternate adding dry ingredients and milk until just combined. Divide the dough into quarters, wrap with plastic wrap, and chill in the refrigerator until firm, about 2 hours.
  3. Using your hands, roll pieces of dough into a ball shape.  Roll dough in confectioners’ sugar until completely coated. Place the cookies 2 inches apart on a Silpat-lined baking sheet. Bake until cookies have flattened and the sugar splits, 12 to15 minutes.
  4. Transfer from oven to a wire rack to let cool completely. Store in an airtight container for up to 1 week

Tuesday, July 14, 2009

Iced Mocha Coffee

Alright, so this is a lame excuse of a recipe...but it's deliciousness in a glass, so I felt the need to post about it.
 
I love coffee. Ever since Girl Scout camp when I was a kid, I have loved the smell of coffee (the leaders would drink it in the morning and the smell would fill the dining hall). On the rare occasions that my family would go out to breakfast, my parents would get coffee and I'd always ask to smell it or have a sip (which I didn't like at the time). Once I got to college, I realized the caffeine benefits of coffee, but would only drink it mixed with half a packet of hot chocolate. Now, I love coffee. I love it hot with cream and sweetener, I love it in Caramel Macchiatos and Skinny Vanilla Lattes from Starbucks, I still love it mixed with half a packet of hot chocolate, I love coffee beans covered in chocolate, I love it as ice cream, I love it in baked goods and I love it cold.
 
Jerm and I have a really nice coffee maker (yay, for bridal registries and my friends at US Airways!), but I don't use it a lot. You see...Jerm doesn't drink coffee and we always have coffee at work, so every weekday I think, "I'll just have some at work." Well, this past weekend our puppy, Diesel, decided to wake up at 4:45am... so I was feeling the need for coffee and I decided to brew a pot. It was warm outside (hi, I live in AZ) so I thought, "Mmmm, iced coffee would be delicious!" And ta da, this deliciousness in a glass was born. It's cold, it's light and there is just a hint of chocolate in there. Definitely try out this drink or a version of it. What else would be good in iced coffee?
 
Enjoy!
 
 
Sara's Iced Mocha Coffee
Ingredients
  • 2/3 glass of coffee
  • Skim milk
  • Ice
  • 1/2 - 1 tsp sugar
  • 1 - 2 tsp Hershey's Chocolate Syrup

Directions

  1. Brew coffee. Either use it hot and add lots of ice, or let it chill for a bit to cool down.
  2. Fill a large glass with ice and add about 2/3 of the way full with coffee.
  3. Add as much skim milk as desired.
  4. Add sugar and chocolate syrup.
  5. Drink up!

Saturday, March 28, 2009

Puppy Chow

In light of our fabulous news about getting a puppy (please see my other blog for details), and the fact that I still have Chex cereal to use up, I decided to make Chex Muddy Buddies, otherwise known as Puppy Chow.  Does anyone else called it Puppy Chow?  Jerm looked at my like I had a second head when I asked him if he wanted me to make him some Puppy Chow...but that's what I've always called it.

This is a very simple and easy recipe, and it's one of my favorite sweet treats.  I do not make it very often because when I do I just want to eat it, but it's great every once in a while and excellent for get-together's.  The recipe is from the box/website of Chex cereal.  By the way, if you have some free time, check out the Chex website because they have a TON of great Chex mix recipes.  There is one with coconut and ginger that Jerm and I love.  Yummy!  So, next time you want a sweet chocolately snack, try this Puppy Chow.  Oh, and check out the substitution tip from the website....I'm definitely going to try that the next time I make this.

Enjoy!

IMG_1405 

Ingredients.

IMG_1406

Choc/PB/butter.

IMG_1407

All mixed, pre powdered sugar.

 IMG_1408[2]

Post powdered sugar and cooling. 

Chex Muddy Buddies a.k.a. Puppy Chow

Ingredients

  • 9 cups Corn Chex®, Rice Chex®, Wheat Chex® or Chocolate Chex® cereal (or combination)
  • 1 cup semisweet chocolate chips
  • 1/2 cup peanut butter
  • 1/4 cup butter or margarine
  • 1 teaspoon vanilla
  • 1 1/2 cups powdered sugar

Directions

  1. Into large bowl, measure cereal; set aside.
  2. In 1-quart microwavable bowl, microwave chocolate chips, peanut butter and butter uncovered on High 1 minute; stir. Microwave about 30 seconds longer or until mixture can be stirred smooth.
  3. Stir in vanilla.
  4. Pour mixture over cereal, stirring until evenly coated. Pour into 2-gallon resalable food-storage plastic bag.
  5. Add powdered sugar.
  6. Seal bag; shake until well coated. Spread on waxed paper to cool. Store in airtight container in refrigerator.

Substitution:  Peanut butter and chocolate are a favorite flavor combo, but peanut butter lovers can substitute peanut butter chips for the chocolate chips to intensify that flavor.